3. The Custom functions screen
A custom function is a graph: a drawing of blocks connected by links, which the VCU runs. This chapter covers the screen where the function is opened, named, imported and confirmed. The drawing itself is in the next chapter.
#Where it is and what it requires
In the desktop version of FuelTech Vision, the side menu has the Custom functions group, between Sensors and calibration and Interface Settings. Inside it are the items Custom function 1 to Custom function 10. When the function has a name, the item shows its name.
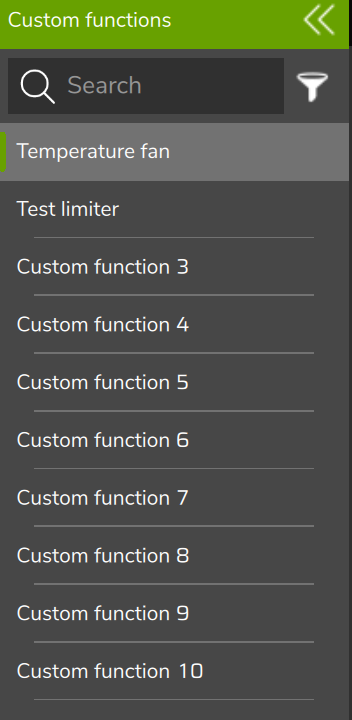
To open the screen, a map must be loaded. A connected VCU is not required: the editor works on the map in memory.
#The 10 functions of the map
Each map has 10 fixed custom function slots, stored inside the map file. There is no command to create an 11th slot or to remove one: "creating" a function means opening one of the 10 items and placing blocks in it. There is also no duplicate function command. To take a function to another slot, export it as .ftcf and import it with the destination slot open, or copy and paste the blocks (next chapter). A left click opens the screen even when the function is disabled; the item appears grayed out.
#Enable and disable
A disabled function stays in the map with all its blocks, but the VCU does not run it, it is not counted by the memory meter (not even the one open on the screen) and it does not take part in the map validations. Enabling is the same mechanism as for all FuelTech Vision functions, not a button on this screen:
- Computer, side menu: right-click on the item opens a menu with On / Off and Favorites.
- Computer, menu search: right-click on a disabled item ("Right mouse click to enable or disable function.").
- Map options screen, in the VCU menu: lists all functions, each with a switch.
#Name the function
In the upper left corner of the Adjust tab is the function name, or the text "No name - click to rename". Click it to edit: the field accepts up to 32 characters. Enter confirms, leaving the field also saves and Esc cancels the edit. The name is saved to the map as soon as you confirm or leave the field, without waiting for Confirm, and appears in the side menu immediately. With an empty name, the item goes back to being called Custom function and the number.
#Erase the contents
The Erase button, in the upper right corner of the Adjust tab, opens the confirmation Erase custom function, with the buttons Cancel and Delete all. The message says: "This action deletes the ENTIRE custom function: nodes, links, text boxes, and the user screen. It cannot be undone after confirming." (the message calls the blocks nodes). The button is only active when there is a block, text box, name or background image.
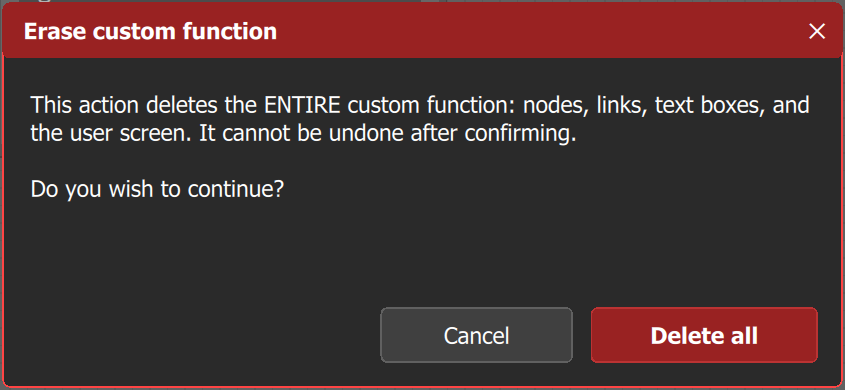
Erase removes blocks, links, text boxes, background image and name, returns the User screen size to the default and turns off the User screen and the advanced mode. The slot continues to exist, empty. Erase does not remove the editing password (chapter Password protection). Erase saves to the map in memory at that very moment, without waiting for Confirm. To keep a function you may want back, export it as .ftcf before erasing.
#Screen structure
The top bar has the tabs and, on the right, the Cancel and Confirm buttons.

| Tab | When it appears | What it has |
|---|---|---|
| User screen | only if the function uses the User screen | the fields, tables and texts that the customer edits (chapter User screen) |
| Adjust | always | the graph: blocks and links. It is the tab of this chapter and the next |
| Screen editor | always | the assembly of the User screen: fields, table, text, background image, size, editing password and advanced mode |
On the Adjust tab, a row of buttons in the upper right corner has, in this order: Fit, Zoom box, Copy, Paste, Import, Export and Erase. The memory meter is in the lower left corner. Below the graph is the function's real-time panel, visible on the User screen and Adjust tabs. With an editing password, the graph and the Screen editor are covered until the password is entered.
#Importing and exporting .ftcf
The .ftcf is the file of a custom function. Import and Export open the system file window (Import custom function and Export custom function, filter "Custom function (*.ftcf)"). Export suggests the function name as the file name (or custom_function, if it has no name) with the .ftcf extension. The file carries everything that belongs to the function: name, User screen data and background image, the cryptographic digest of the editing password (hash, chapter Password protection), advanced mode, blocks and links. Before saving, the editor copies what is on the screen to the map in memory.
Import has these practical effects:
- Import replaces the open function. Its blocks and links are deleted and the function is rebuilt with the contents of the file. The screen does not ask for confirmation or choose an empty slot: open the destination item first.
- Import shows no success or error message. If the file is not a valid .ftcf, the open function does not change and nothing appears: check in the graph that the blocks arrived.
- Import does not check memory. Excess only shows up when writing to the VCU.
- After importing, the Confirm button becomes active. If the file has an editing password, the imported function is locked.
Before importing over a function you want to keep, export it. After importing, check in the side menu that the function is On / Off as you expect.
#Cancel and Confirm
Confirm copies what is on the screen to the map in memory, runs the map validation and marks the map as changed. It sends nothing to the VCU: saving the map file and writing to the VCU are separate steps. The validation can show a warning when a custom measurement is configured on an analog input and is also written by a Value for VCU block of an enabled function: the two sources compete for the same channel.
Cancel reloads the function from the map in memory. Several actions already write to the map immediately, without waiting for Confirm: adding a block, deleting a block, paste, import, export and Erase, and each one writes everything on the screen at that moment, links and positions included. The name is also saved when you confirm the field. Therefore, do not use Cancel as undo: export a .ftcf before big changes. On the User screen tab, both buttons also appear, and the value the customer types stays as a draft until Confirm.