10. User screen
The user screen is the part of the function that the end customer sees. On it, the customer adjusts only what you exposed and does not see the graph, the drawing of blocks and links of the function. Each field on the screen is a parameter of a block. You decide which ones appear, where they go and what they are called. If you received the function ready-made, read the section What the customer sees and does, at the end of this chapter; the rest is for those who create the function.
#Turning on the user screen
- Open the function in the Custom functions menu and go to the Screen editor tab.
- Check the Use User screen box. The default is unchecked.
- Click Confirm on the top bar. Changes in the Screen editor only enter the map with Confirm.
With the box checked, the function has three tabs: User screen (the first, public), Adjust (the graph) and Screen editor. With the box unchecked, it has only Adjust and Screen editor. If the function has a password and the box is unchecked, both tabs are locked and the customer finds no screen to use: check the box before setting the password.

#Choosing what the customer adjusts
Every field starts out hidden. You choose field by field, through the gear in each block's header, whose tooltip is Block settings.
- In the graph (Adjust tab), click the block's gear. The Block settings dialog opens.
- In the list (Field, Custom name, Show, Advanced), check Show on the fields the customer should see and fill in the Custom name of each one.
- Click Confirm on the top bar.
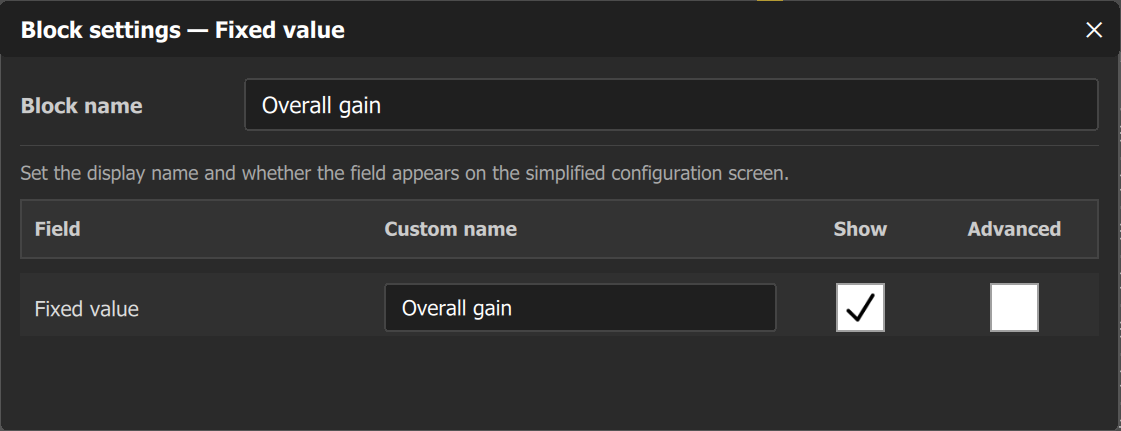
The field appears on the screen with only the Custom name. If it is empty, the field's default name appears, the same in every block of the same type, and the block name does not appear. So give a Custom name to every field shown. This name is free text and is not translated: a name typed in Portuguese stays in Portuguese for anyone who uses FuelTech Vision in English or Spanish. The default name follows the language of FuelTech Vision.
At the top of the dialog, Block name only saves non-empty text: erasing the text does not bring back the default name. The dialog's help text calls the user screen the "simplified configuration screen". It is the same screen.
The Advanced column is only enabled when Show is checked. An advanced field appears only when the button on the Screen editor bar shows Mode: advanced. In Mode: basic, the default, it disappears from the Screen editor and from the user screen: to position it, switch to Mode: advanced. The mode in which you leave the function is the one the customer receives. With a password, only you can reach this button.
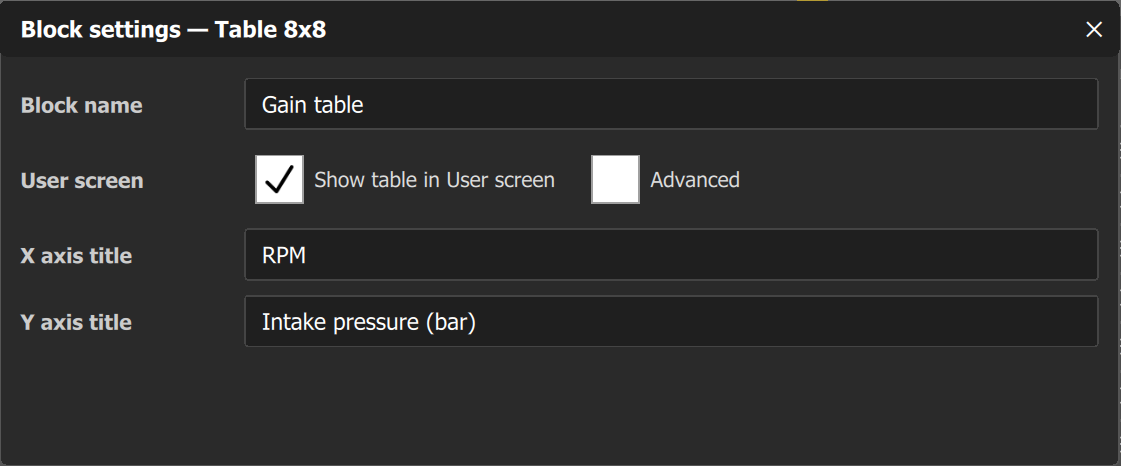
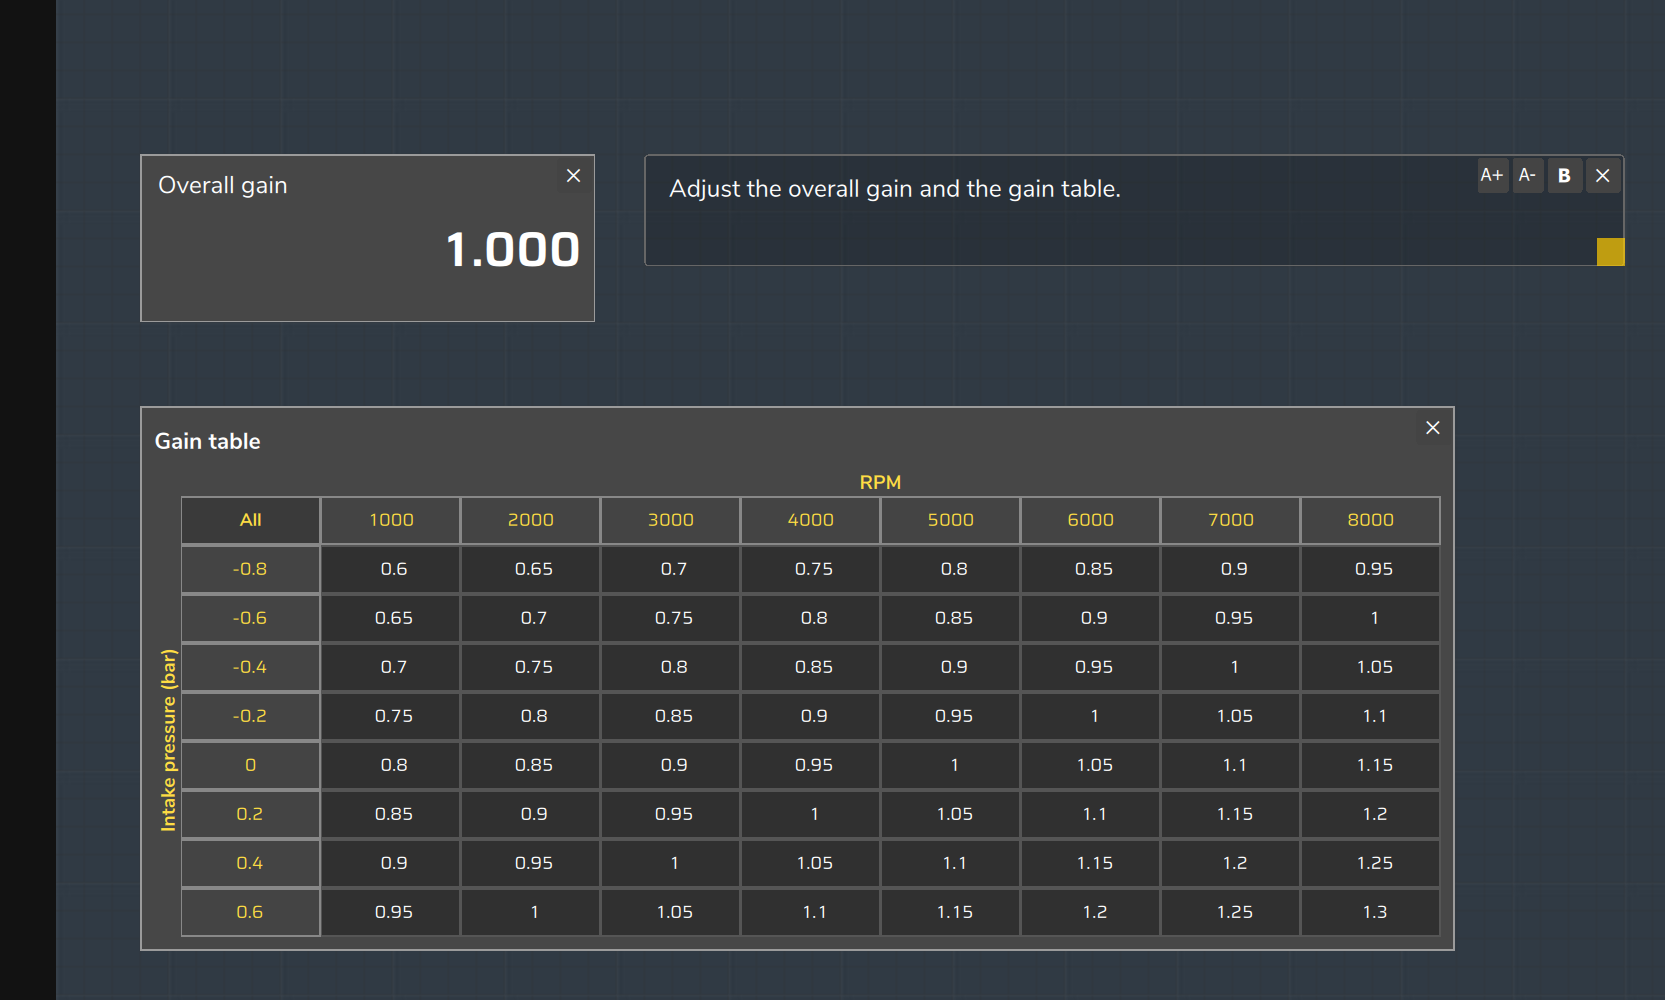
Table and vector blocks go in whole, not field by field. In the Block settings dialog, check Show table in User screen. Tables accept X axis title and Y axis title; vectors, Column titles. The titles are for display only and do not go to the VCU. On the screen, the block name appears as the table title.
#What to expose and what not to expose
The field on the screen accepts what the block's parameter accepts, and table cells have no range: the customer types any value within what the parameter accepts. To limit what the customer applies, put a Limiter after the exposed value, adjust its minimum and maximum (the default is 0 to 100) and do not expose them. Expose what the customer is meant to tune; hide the wiring and the protection limits.
| What it is | Blocks and fields | Policy |
|---|---|---|
| Targets, gains, calibration limits and times | Fixed value (value), Hysteresis (thresholds), Delay, Cyclic timer, Ramp | Expose |
| Tables and vectors | Table 4x4, Table 8x8, Table 12x12, Vector 1x4 to Vector 1x16 | Expose |
| PID gains | Block inputs, not fields: connect a Fixed value to each gain and expose the Fixed value | Expose through the Fixed value |
| Protection limits | Minimum and Maximum of the VCU action, the limit the VCU applies before the action; minimum and maximum of the Limiter that protects the engine or the load | Do not expose |
| Input and output channels | Channel of VCU value and of Value for VCU; output of On/off output, PWM output and Analog output 0-5V | Do not expose |
| Operations, modes and actions | Operation of Math operation and of Logic; mode of the Switch; which action the VCU action block performs | Do not expose |
Each extra Fixed value takes 6 bytes of configuration and 4 bytes of working memory. The Multiplexer has no field to expose.
#The three types of element
| Element | What it is |
|---|---|
| Field | Block parameter. A list of options becomes a selector; a number becomes a numeric field, with the parameter's own minimum, maximum, step, decimal places and unit. |
| Table or vector | 4x4, 8x8 or 12x12 table, or 1x4, 1x8, 1x12 or 1x16 vector. The customer edits the cells; the axes are read-only. |
| Text box | Free label, not tied to any block. The customer can only read it. |
| Does not exist | Image, chart, button, indicator or live-value element. |
#Arranging the screen
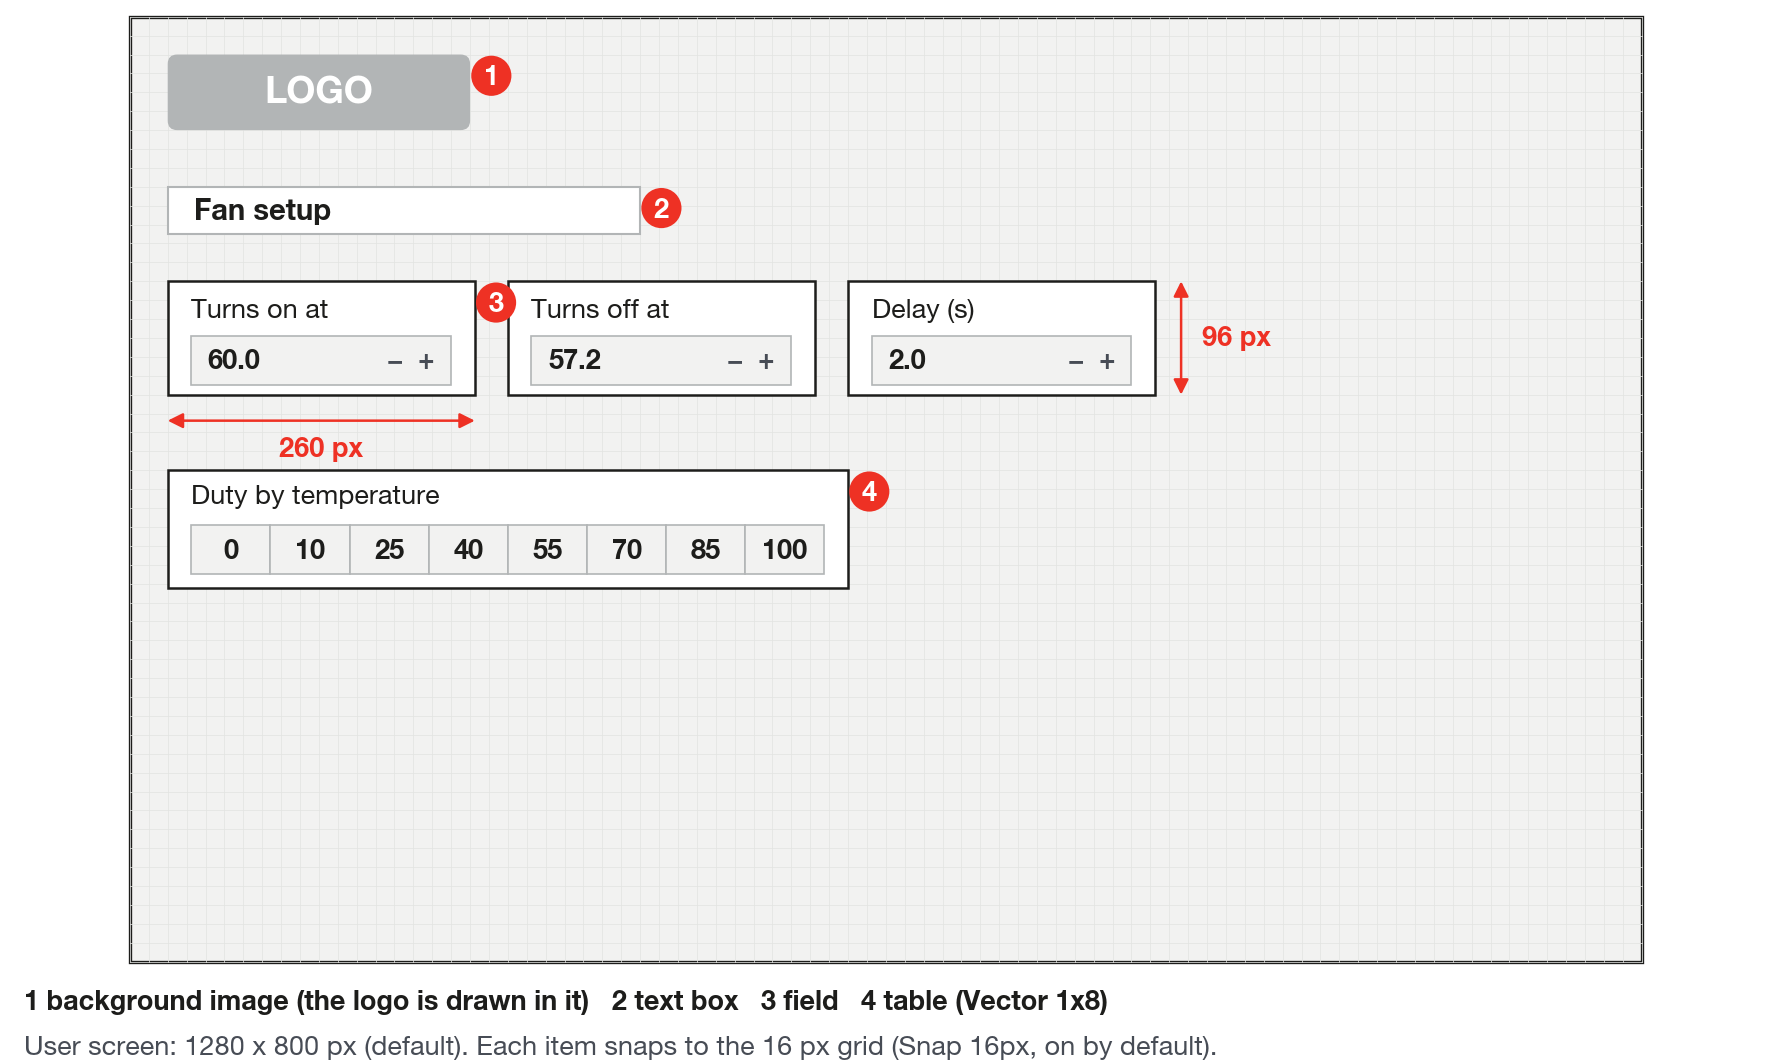
In the Screen editor, drag each element with the mouse. When you release it, the position is rounded to the 16 px grid, if Snap 16px is checked. The drag stays within the screen. The position of each element is saved in the file.
An element that is shown and has not yet been dragged is placed in an automatic cascade in the upper left corner, and a table with no position is placed on top of the first field. Drag every element before delivering.
The X in the corner of a field or a table only removes the element from the screen: it unchecks Show, and you bring it back through the block's gear.
#Size of the elements and the screen
| Element | Width (px) | Height (px) |
|---|---|---|
| Field | 260 | 96 |
| Table 4x4, 8x8 and 12x12 | 416, 736 and 1056 | 184, 296 and 408 |
| Vector 1x4, 1x8, 1x12 and 1x16 | 360, 576, 832 and 1088 | 100 |
| New text box | 200 | 40 |
The measurements apply at scale 1.0. An axis or column title adds 15 px to the width or to the height. When the customer selects cells, the table grows 36 px in height to show the editing bar.
The Size: field defines the screen. The default is 1280 x 800 px. The width goes from 320 to 4096 px and the height from 240 to 4096 px, in steps of 10. The screen has fixed pixels and does not adjust to the window: if it is larger than the window, scroll bars appear. A 12x12 matrix takes up 1056 of the 1280 px of the default screen, so no 260 px field fits beside it. After reducing the size, check whether any element ended up outside the visible area.
#Text box
The + Text box button creates a box in the center of the screen, 200 x 40 px, with the text "Text" (the screen shows "Texto"). Edit the text directly in the box: Enter and Tab confirm, and Shift+Enter breaks the line. The A- and A+ buttons change the font size from 8 to 48, in steps of 2 (the default is 14). The B button turns bold on and the close button deletes the box. The yellow handle in the corner changes the size, with a minimum of 60 x 24 px. To move it, drag by the 12 px strip on the left edge, with the text not in edit mode. Use it for labels and notices.
#Logo and background image
The screen has a single image, which sits in the background. There is no logo element: the logo must be drawn inside the background image.
- In the Screen editor, click Background image.
- In the Select the background image dialog, choose the file. The filter accepts PNG, JPG, JPEG, BMP and WEBP.
- Click Confirm on the top bar.
FuelTech Vision converts the image to JPEG, at the original resolution, and stores it inside the function. The original file is not kept. FuelTech Vision does not limit the size or shrink the image. JPEG does not keep transparency: if the logo has a transparent background, check on the screen how it turned out. If the image does not appear, FuelTech Vision ignored the file without showing a message: test the format you intend to use.
The image travels with the function: it goes in the .ftcf file, in every map that contains the function and in every log recorded with that map. Use a small image file. It does not go to the VCU.
The image is fitted to the whole screen with no cropping and no distortion, keeping the same aspect ratio, until it fits. When the image's aspect ratio differs from the screen's, a strip in the screen color is left over. For a background with no strip, use the same aspect ratio as the screen. The default screen, 1280 x 800 px, has a 16:10 aspect ratio.
To replace the image, click Background image and choose another file. To remove it, click Remove background, which is only active when an image exists. The Erase button on the Adjust tab also removes the image, along with the entire function.
#What the customer sees and does
The Custom functions menu is in the desktop version of FuelTech Vision. The customer opens the function from the side menu. The item shows the function name (up to 32 characters) or Custom function with its number. With Use User screen checked, the function opens on the User screen tab.
On this tab, the customer edits the value of each field shown and the cells of each table or vector. In a table, the customer selects rows, columns or All (with Ctrl, several) and uses the editing bar. Set puts the typed value in all selected cells. +/- adds the typed value to each cell, and a negative value subtracts. × % multiplies each cell by the typed value divided by 100. Interp fills the row, the column or the table with values interpolated between the ends, which stay as they are.
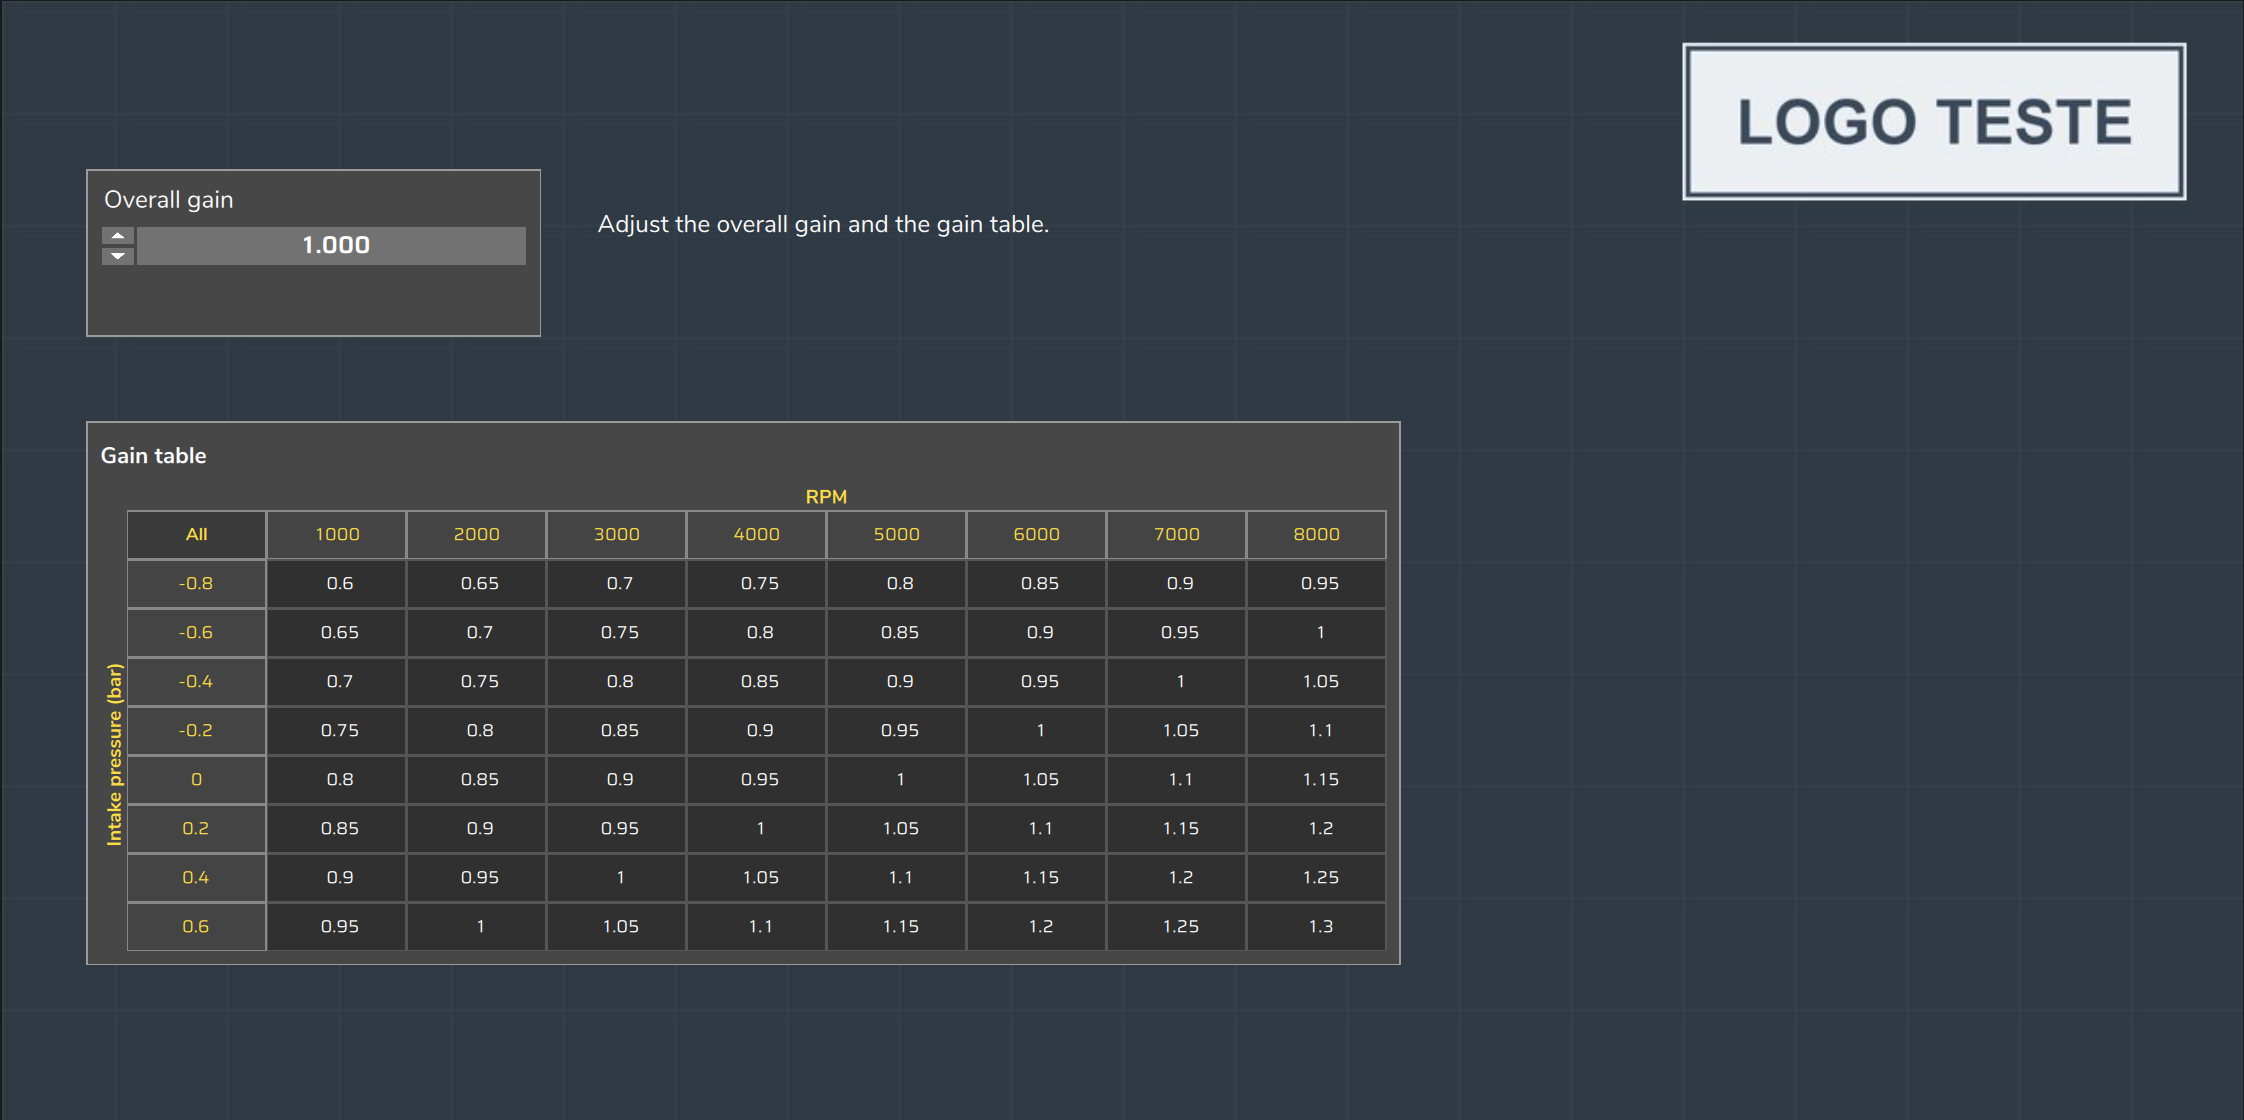
The typed value stays as a draft until the customer clicks Confirm, which writes it to the map open in FuelTech Vision. Cancel reloads the function from that map.
The customer does not move, hide or delete elements and does not edit table axes or text boxes. Without a password, the Adjust and Screen editor tabs stay open and the customer sees and edits everything.