4. The editor
The editor comes in three forms: mouse and keyboard on the PC; touch with a floating button and floating panels on the FT700, the FT700 Plus and the tablet; touch with sheet panels on the phone. All three edit the same dashboard, which is stored inside the map.
A target is the device the dashboard is drawn for (section 1.2), chosen in the Device list: VCU (FT700), VCU (FT700 Plus), Desktop, Mobile, Tablet, Media Device (reserved in this version, section 1.2) and Video Overlay.
#4.1 Open the editor
First open the map and check the target (sections 2.1 and 2.2).
| Where | Path |
|---|---|
| PC | Side menu Interface Settings > Dashboard setup (6th item of the group). |
| FT700, FT700 Plus and tablet | Interface menu > Dashboard setup (5th item). On the unit, the editor runs on the display. |
| Phone | Interface Settings menu > Dashboard setup (5th item). |
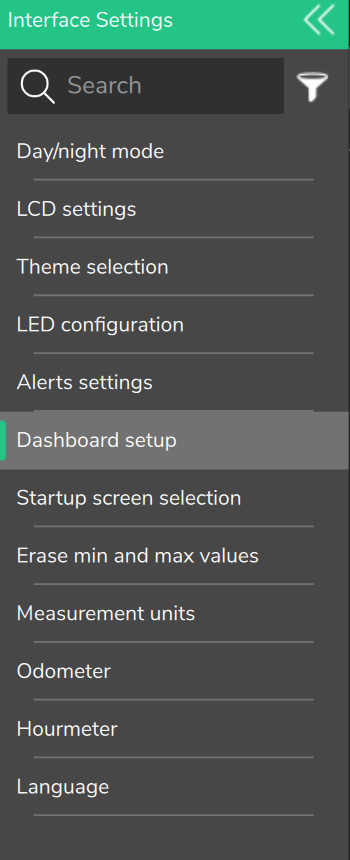
On the PC, the F3 key (Dashboard FT700 in the shortcut list) opens the editor for all targets in its own window, only with a map loaded; F4 (Dashboard FT700+) opens nothing in this version. The five items of the Dashboard menu (all start with Dashboard) only display the dashboard: they do not edit. In the Video Overlay Composer, Open full DashG2 editor (Video Overlay) opens the editor on the Video Overlay target (DashG2 is the internal name of the dashboard; chapter 12). With no map open, the phone and the tablet edit a local dashboard (.ftds): in the Home, Dashboards tab, use Create or Edit (section 13.6).
#4.2 PC editor
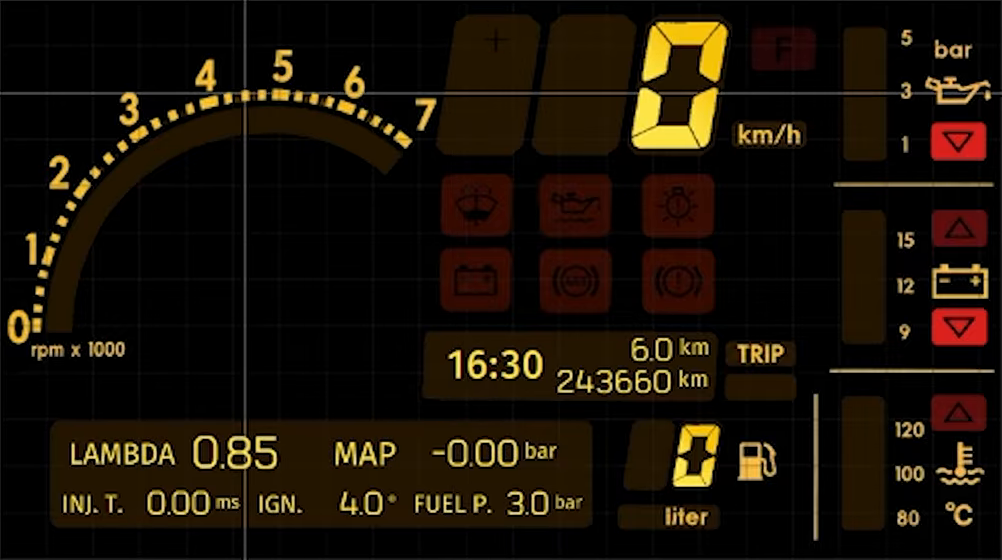
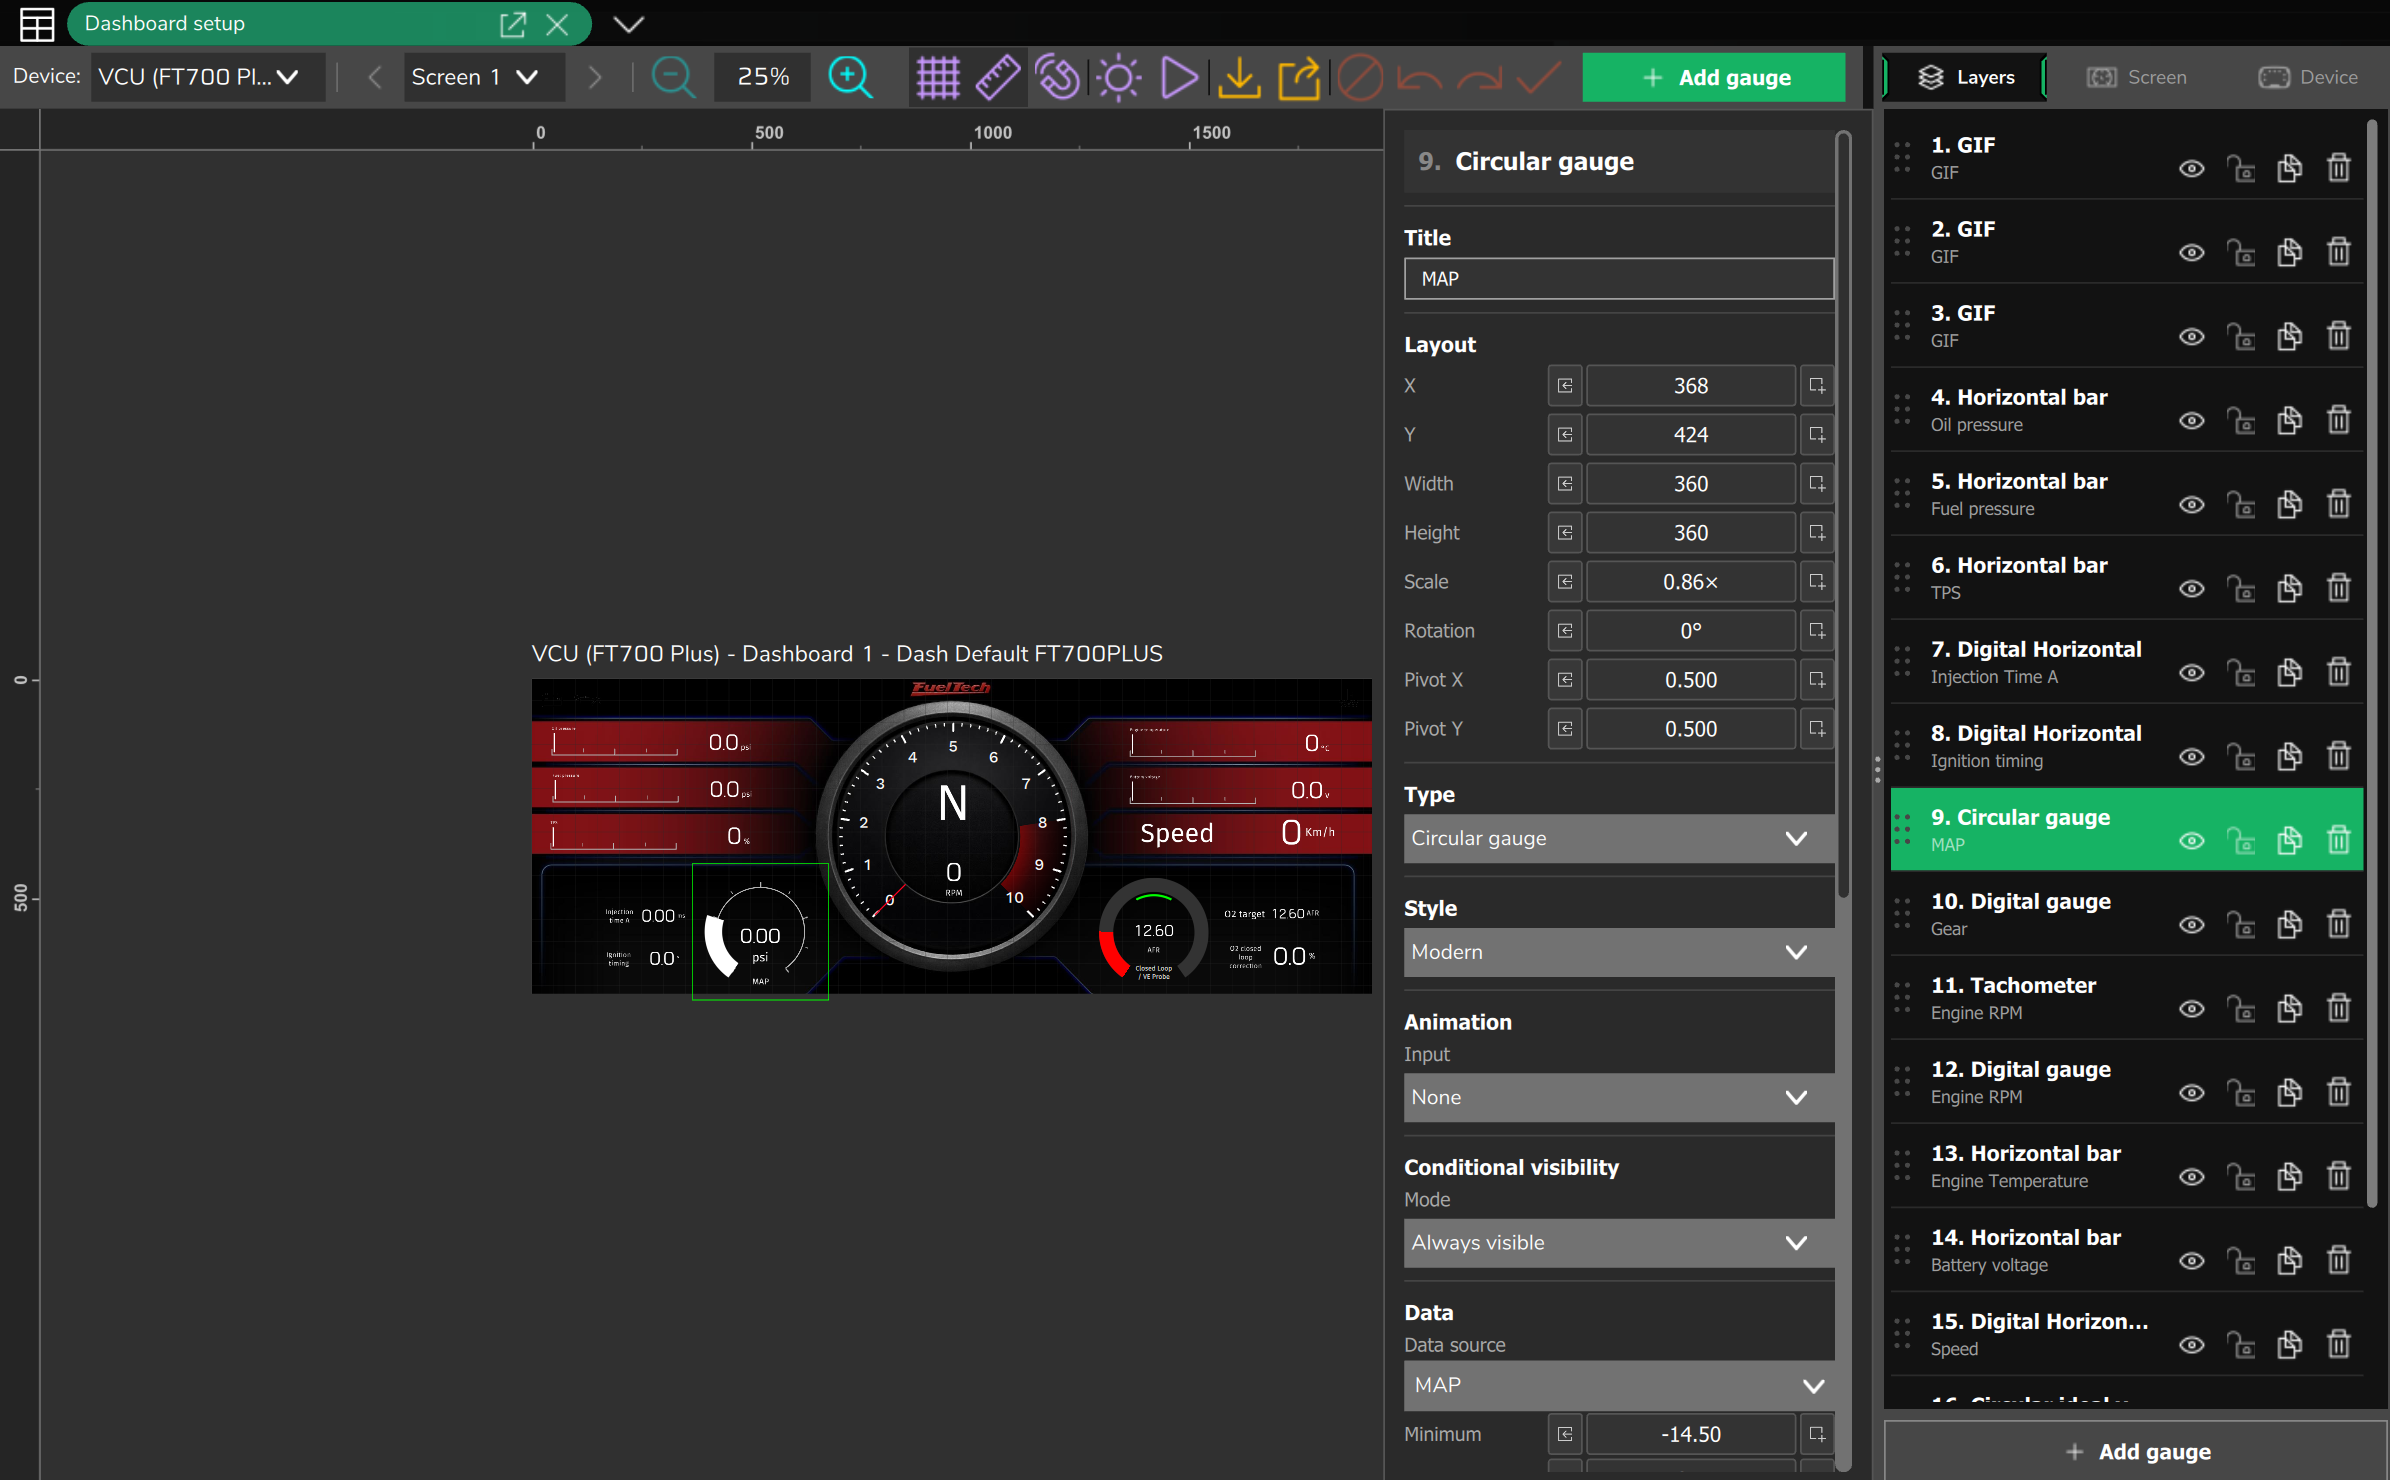
The canvas of the PC editor is the drawing area, at the resolution of the target.
#Areas and top bar
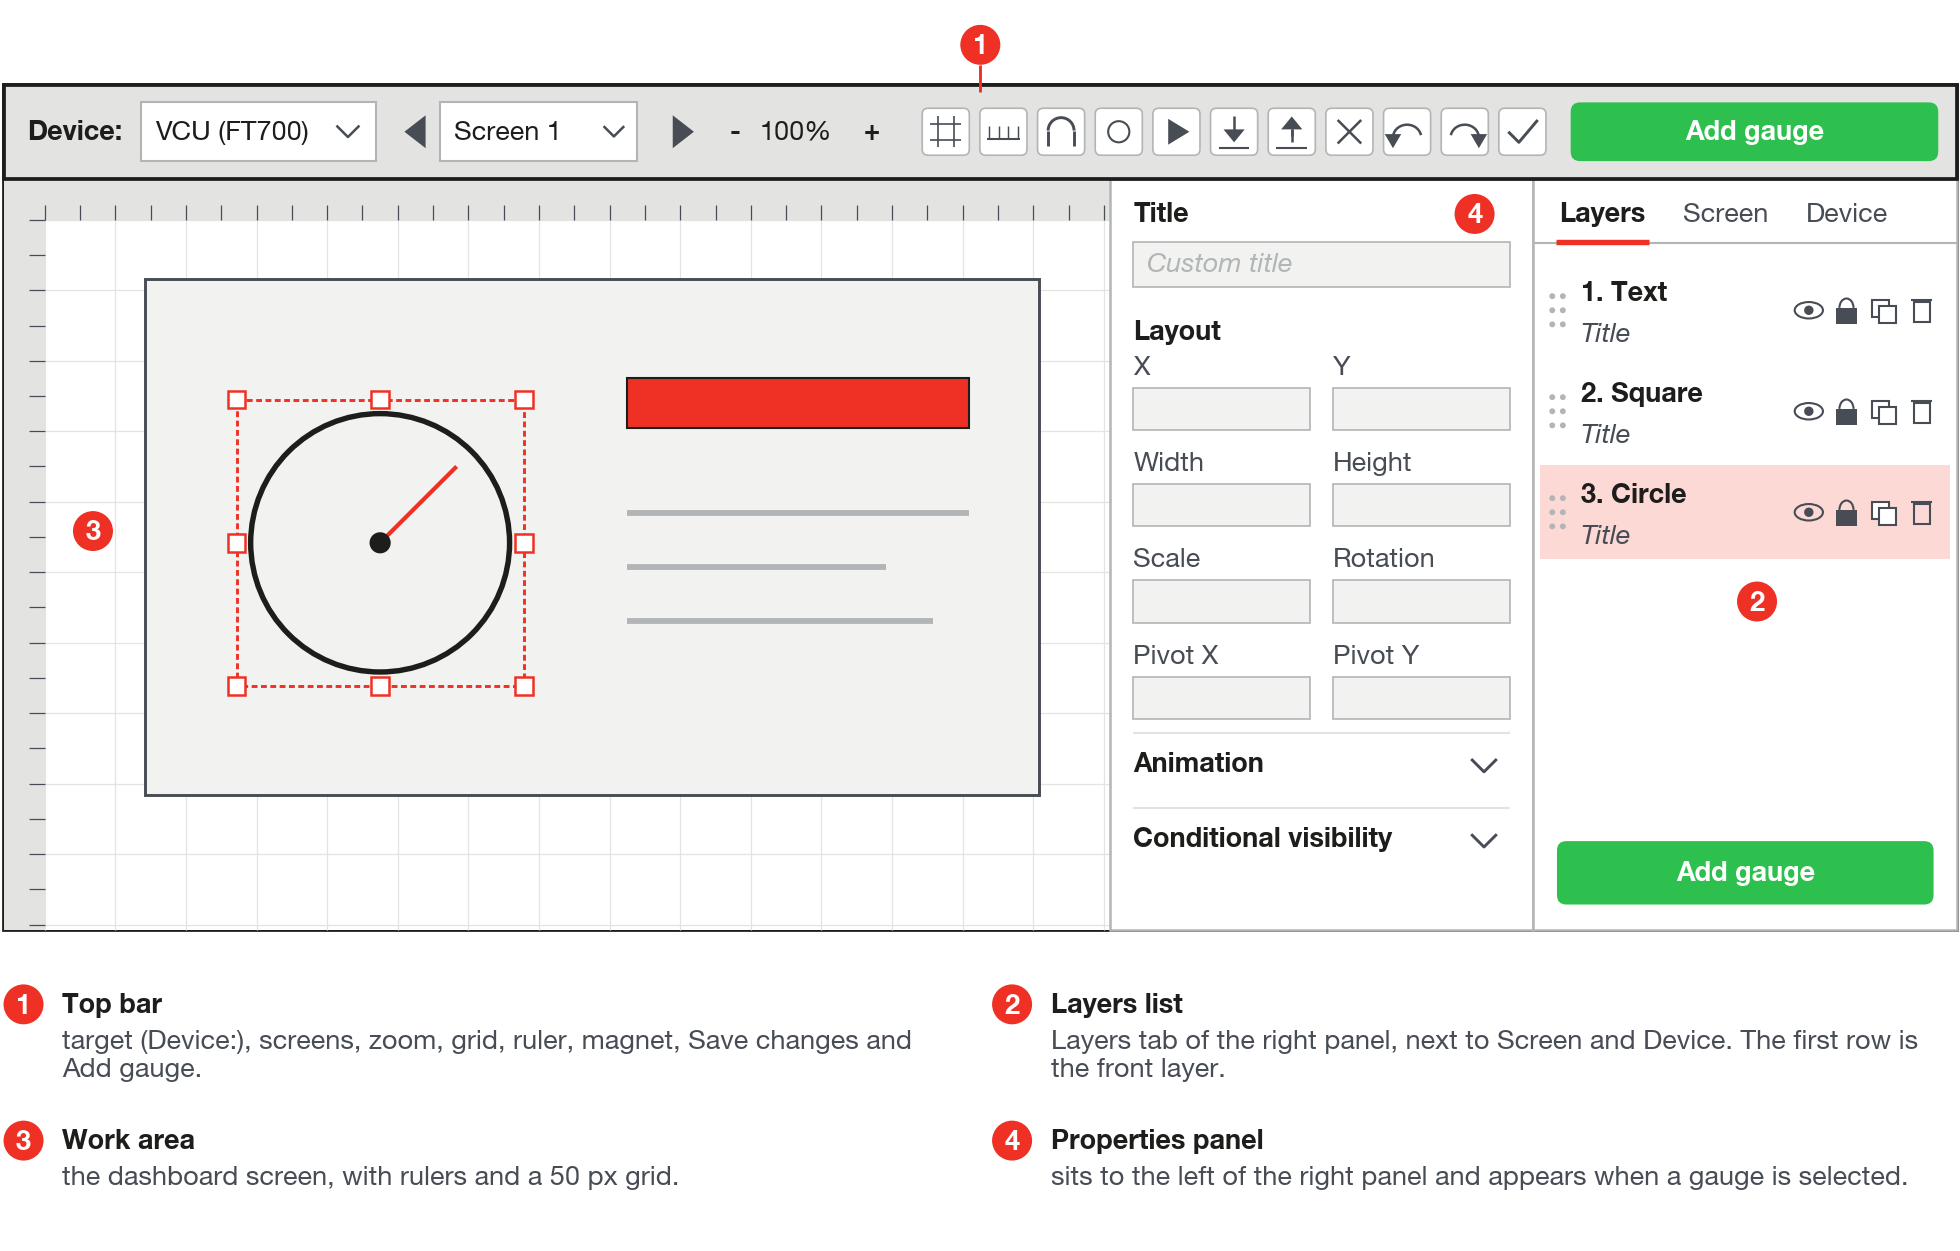
The right panel has the tabs Layers (opens first), Screen and Device. The gauge properties only appear with a gauge selected. In the top bar, the icons only show the tooltip when you hover the mouse over them. From left to right: the Device: list; Previous screen, Next screen and the Screen N list; Zoom - and Zoom + (from 25% to 300%, in steps of 10 percentage points; double-clicking the level goes back to 100%); Show grade (the grid; on by default), Show pixel (the pixel ruler) and Setup snap; Simulate day/night mode and Simulate entrance animations; Import dashboard from .ftds file and Export dashboard to .ftds file (sections 13.3 and 13.2); Cancel changes, Undo, Redo and Save changes (sections 4.6 and 4.8; Cancel and Save only activate with changes); and the green Add gauge button.
#Work area
| Action | How to do it |
|---|---|
| Pan the view | Drag with the right button. Zoom: Ctrl + mouse wheel. |
| Select | Click the gauge (a locked one does not respond to a click on the canvas: use the Layers list). Ctrl + click toggles. Dragging on an empty area draws a rectangle. |
| Move | Drag: the selected ones move together, including the locked ones. The arrows move 1 px and, with Shift, 10 px. |
| Resize | Edge handles change Width or Height (minimum of 10 px). Corner handles change the scale, keeping the aspect ratio (minimum of 0.1); with Shift, from the center. |
| Rotate | Click again on the gauge already selected alone: the border turns blue (rotation mode) and the corner handles rotate it, from 0 to 360, in steps of 1 degree. The green dot changes the pivot (Pivot X and Pivot Y, from 0 to 1). |
#Grid and snapping
The editor grid has lines every 50 px and is not configurable. Snapping is a different feature, with a step of 20 px: when dragging, the gauge sticks within 4 px of a multiple of 20. It only acts when dragging: check X and Y in the properties.
In the Setup snap menu (snap is the feature that pulls a gauge into position), Snap to grid turns on snapping to the grid and Snap to Objects sticks edges and centers to those of other gauges, also within 4 px. Both come turned off. Under the title Alignment Points are six align buttons (left, horizontal center, right, top, vertical center and bottom): with one gauge, they align to the edge of the canvas; with two or more, to each other.
#Gauge properties panel
The panel has Title (Custom title field), Layout (X, Y, Width, Height, Scale, Rotation, Pivot X, Pivot Y), Type, Style, Animation, Conditional visibility and the fields of the type (chapter 6). Inside a group, Width and Height are disabled: Scale sizes the content.
The Type field swaps the gauge for another one in the same category of the types window (Primitives and Pointers count as one). Changing the Data source opens Reload data?: with Yes, minimum, maximum and decimal places change to the defaults of the new measurement (chapter 9).
With several selected, the panel shows n layers selected, batch actions, alignment, Group and Delete selected n.
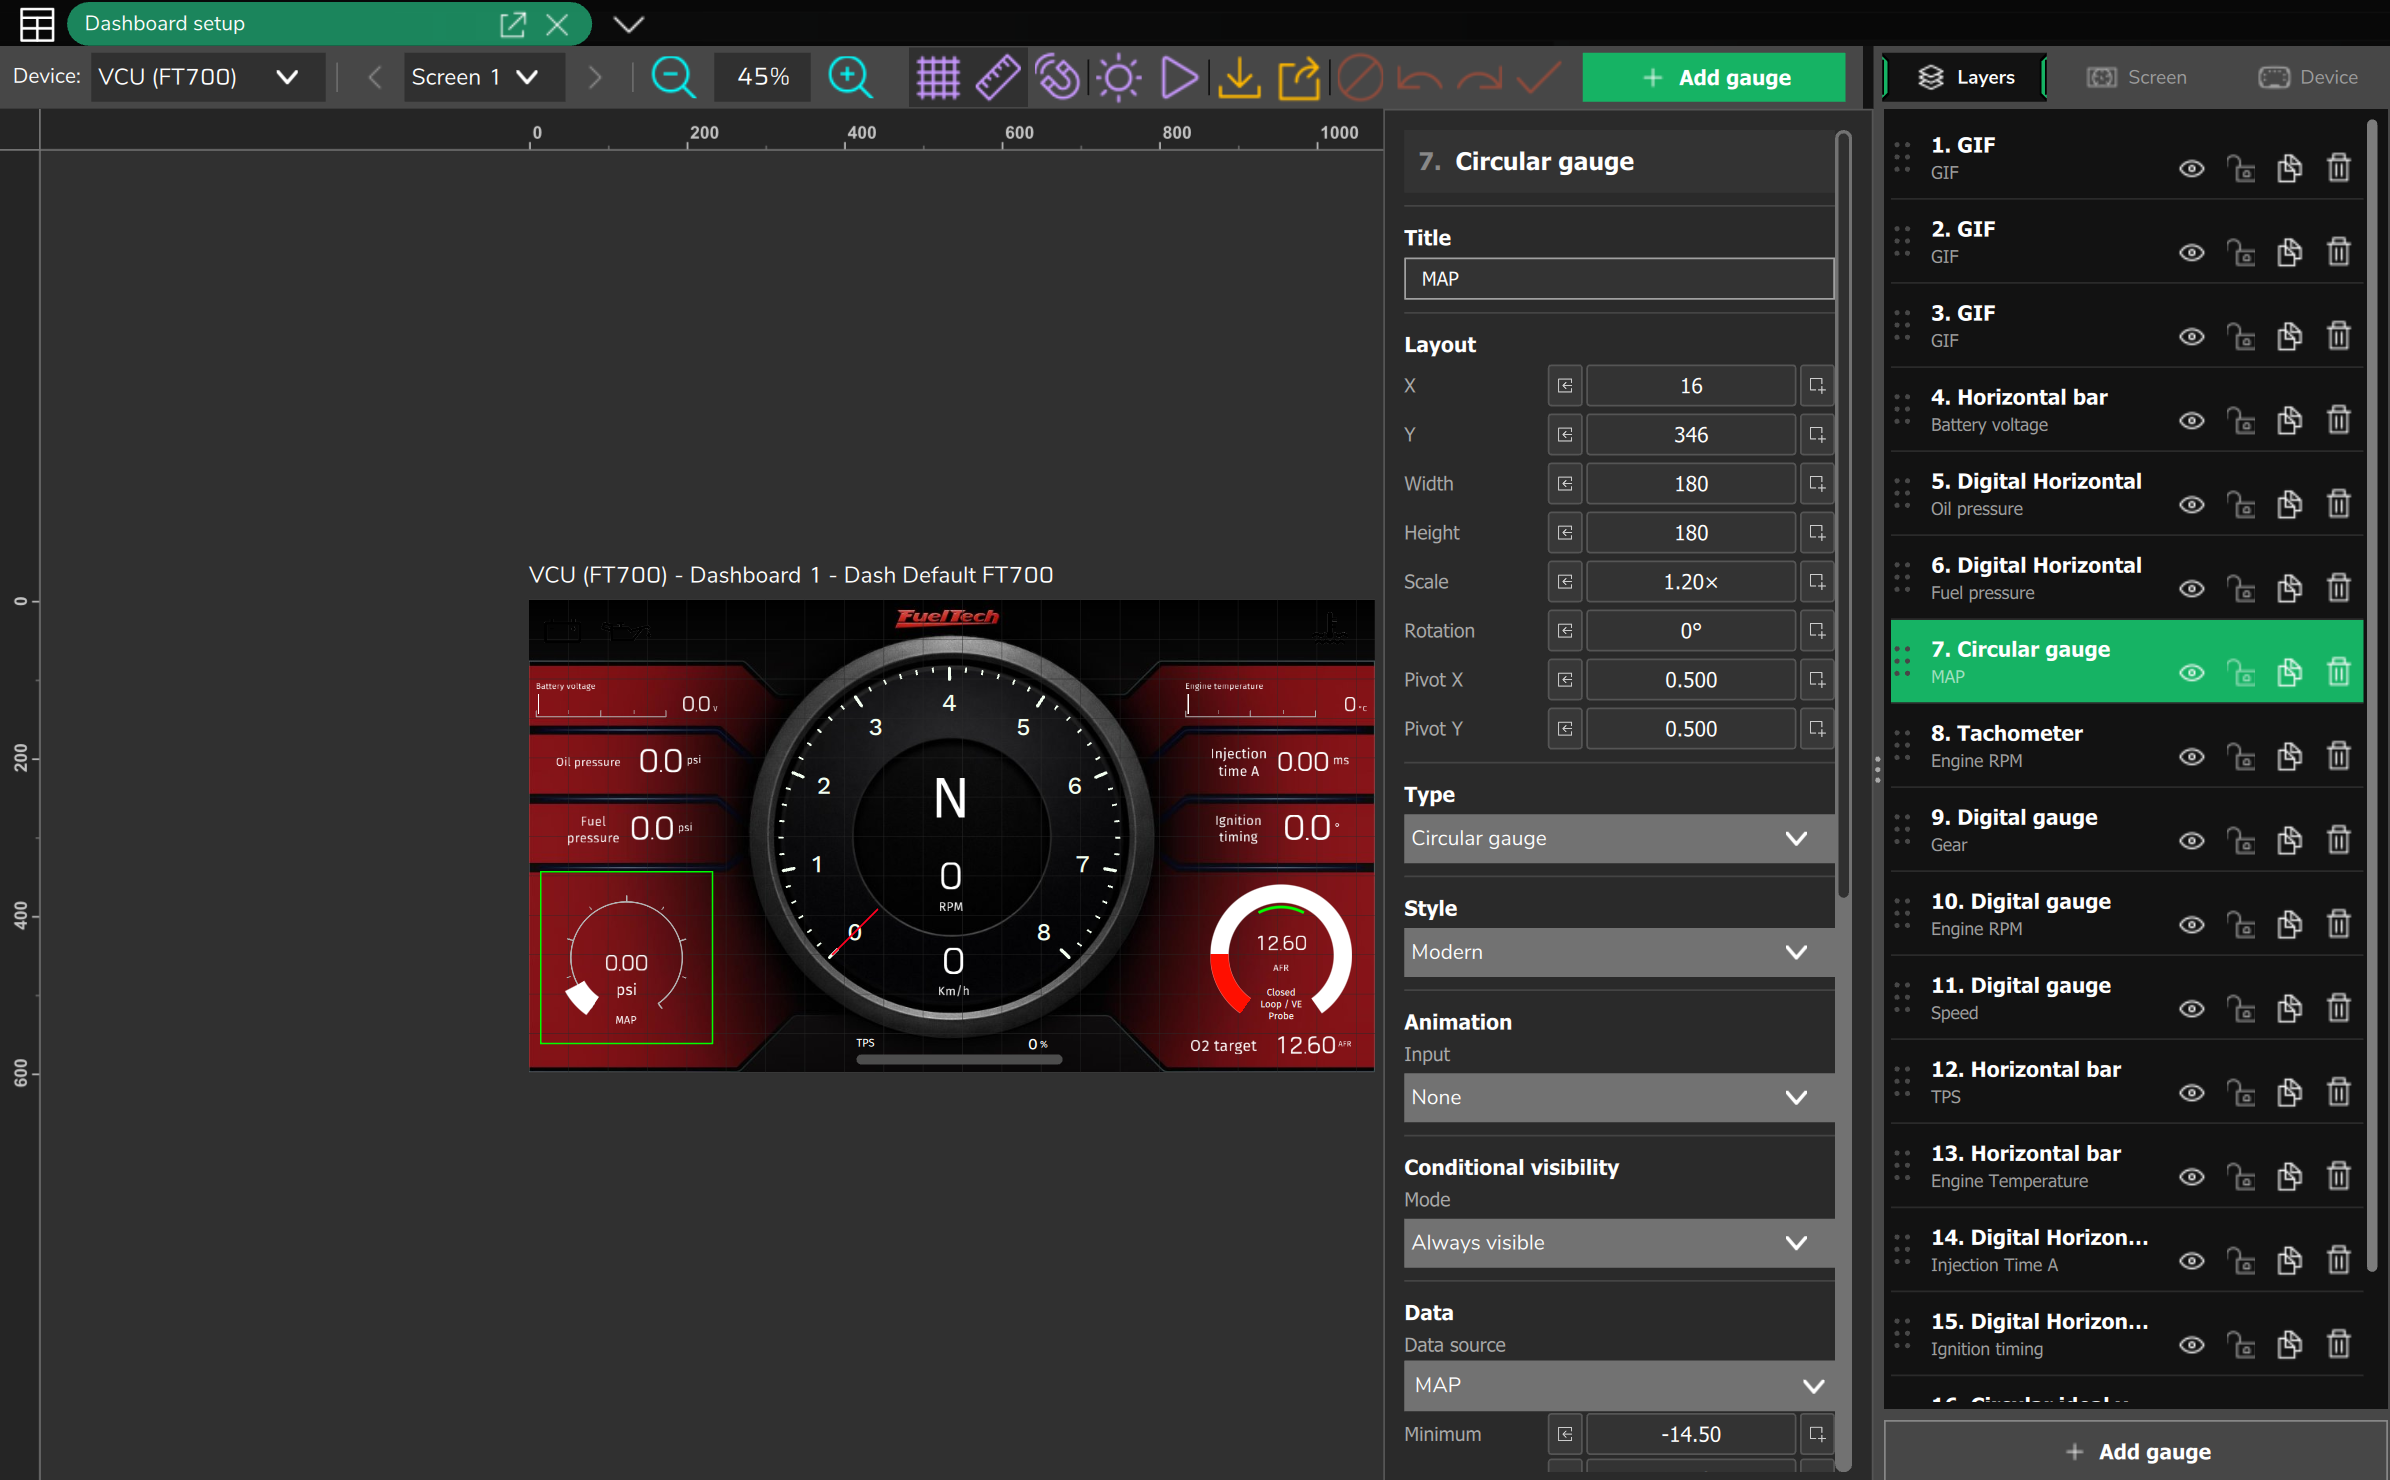
#PC keyboard shortcuts
Ctrl + C copies, Ctrl + X cuts, Ctrl + V pastes at the cursor point, Delete deletes, Ctrl + Z undoes, Ctrl + Y or Ctrl + Shift + Z redoes, Ctrl + G groups and Ctrl + U ungroups.
#4.3 Touch editor
The FT700, the FT700 Plus, the tablet and the phone use the same touch editor, with no top bar, rulers or handles: size and rotation are changed by typing in Width, Height, Scale and Rotation in the properties panel. The grid is a 20 px checkerboard that is always drawn, with no control and no snapping.
#Common parts
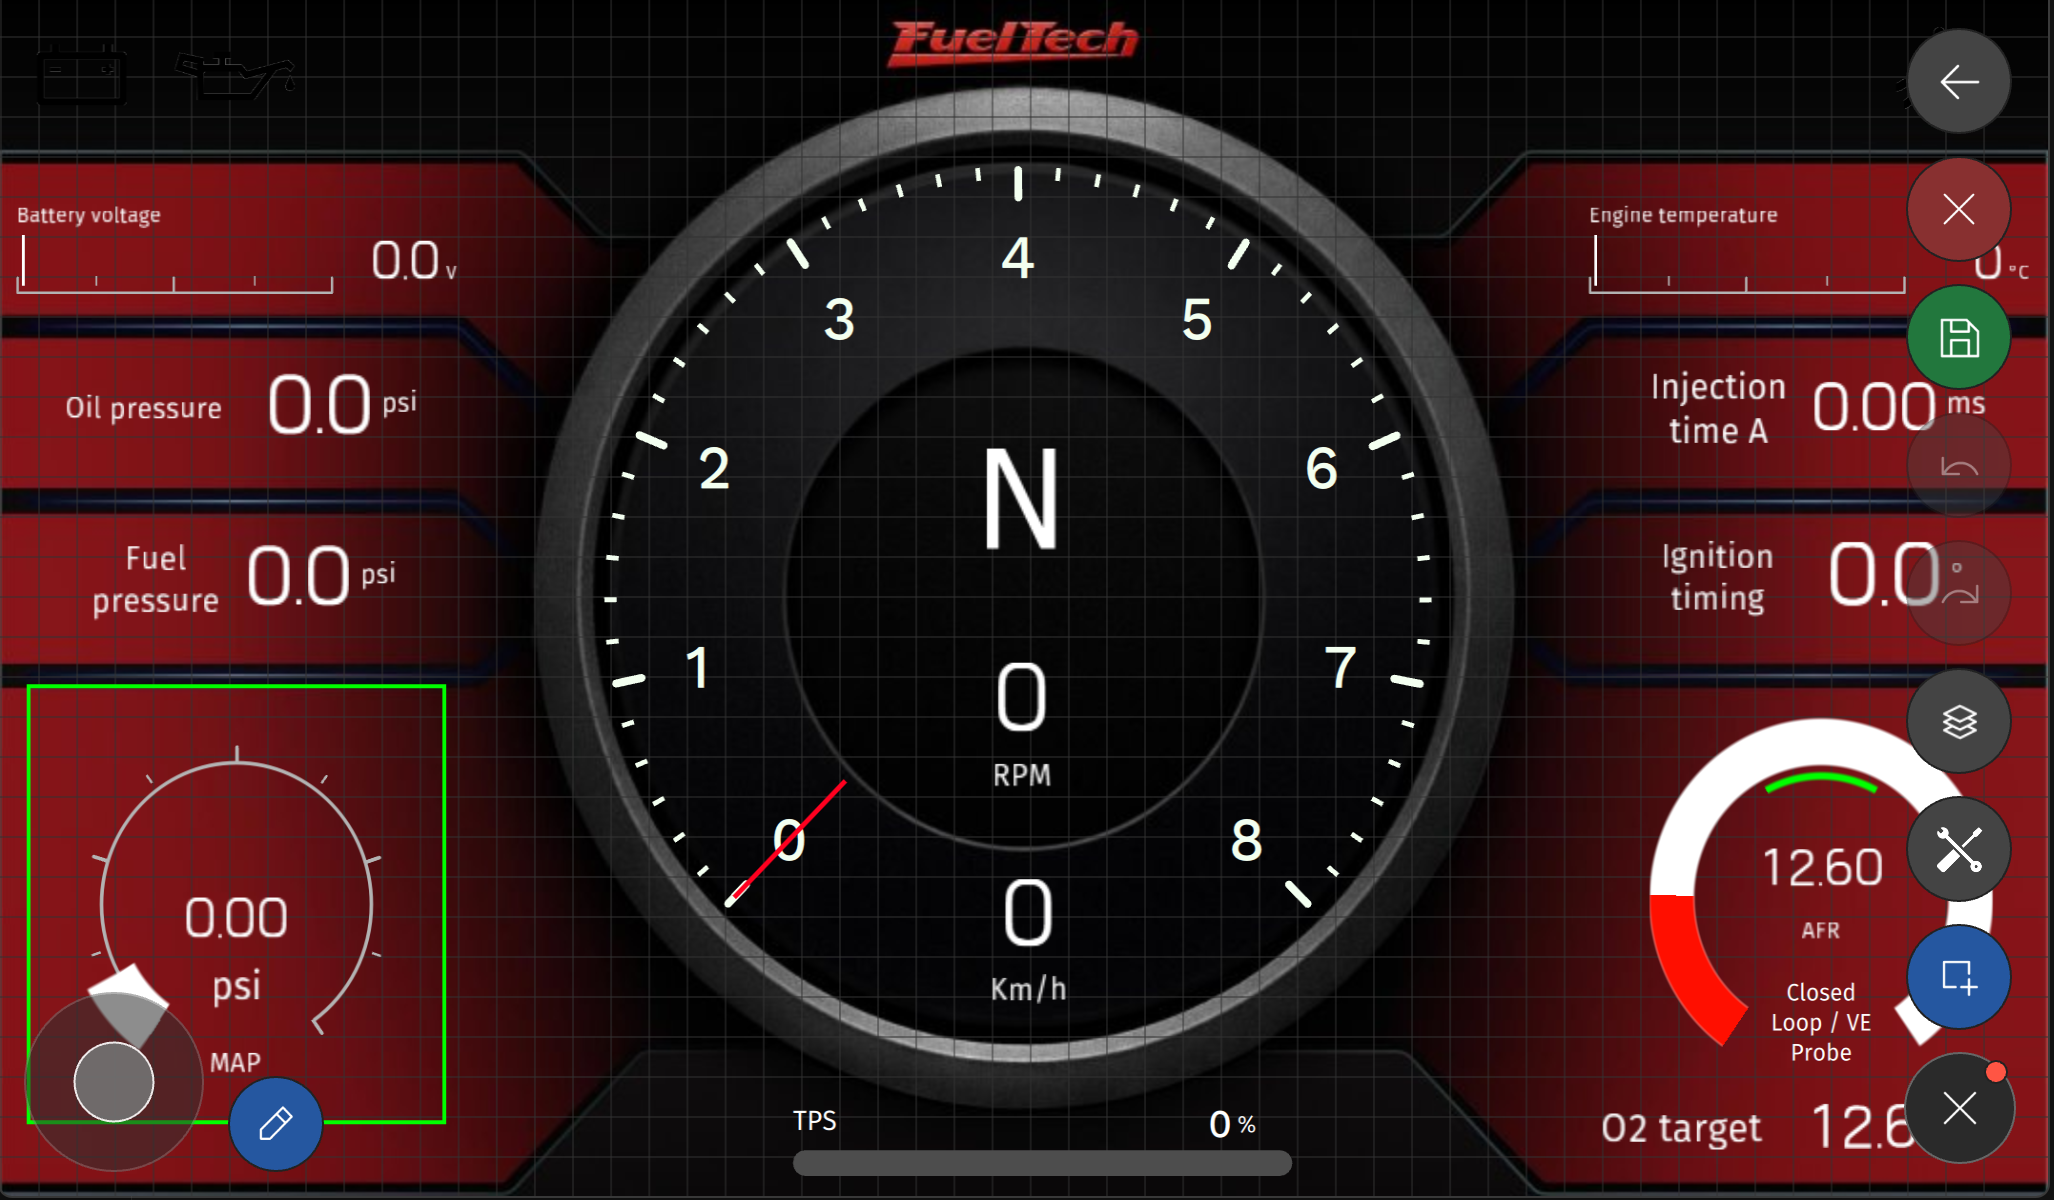
| Part | What it does |
|---|---|
| Floating button | Round button in the lower right corner, with a red dot when there is a change. Opens a column of icon-only buttons (below). |
| Joystick | Disc in the lower left corner, only with a selection: moves the selected ones (except the locked ones) in the direction of the finger. |
| Edit button | Blue button next to the joystick: opens the properties panel of the selected gauge. The panels are floating windows; the x closes the panel without deselecting. |
| Quick menu | Hold for 500 ms on a gauge, with no other selected: a bar with hide or show, lock or unlock and delete. With another one already selected, the long press adds to the selection. |
| Touch and drag | Tapping selects. Dragging moves (a locked one does not drag). Dragging on the empty area draws the selection rectangle, and tapping it deselects. |
The floating button column has, from top to bottom, icon only: Exit, Select target (tablet and phone only), Cancel changes and Save (only with a change), Save local (tablet and phone only), Undo and Redo, Layers, Dashboard Settings and Add (list in section 4.5). Dashboard Settings opens the tabs of section 4.7.
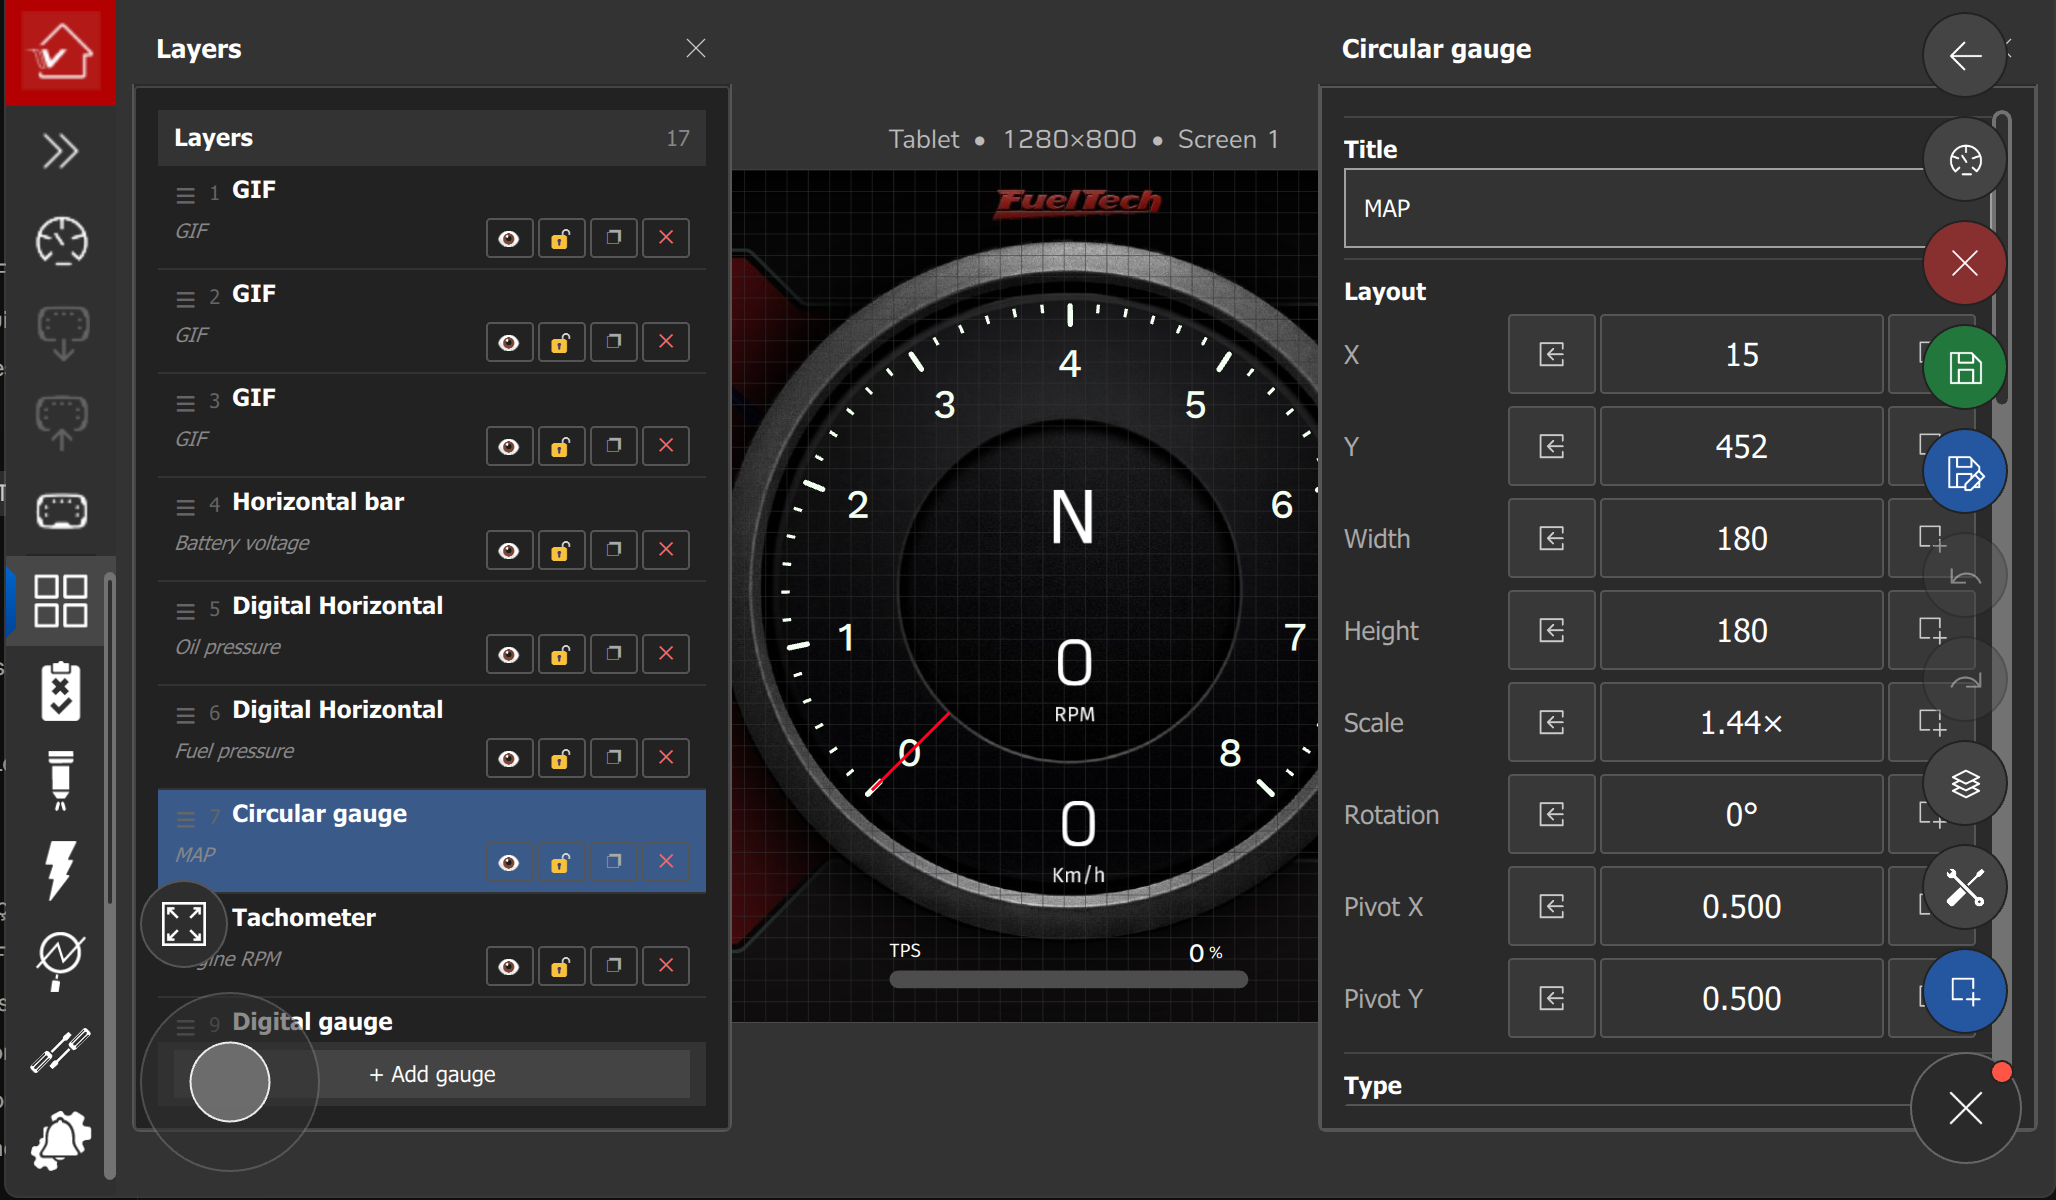
#FT700 7" and FT700 Plus
- The FT700 edits only the VCU (FT700) target, on the unit's display, with no target selector or keyboard shortcuts. The design canvas is 1074 x 600 px and the editor fits it to the physical width of the display (section 2.3).
- The FT700 Plus has the same design, with a 1920 x 720 px canvas. Swiping to change screens is turned off during editing: use the screen navigator. With a keyboard connected to the unit, the shortcuts of section 4.2 apply, except Ctrl + G, Ctrl + U and the arrows.
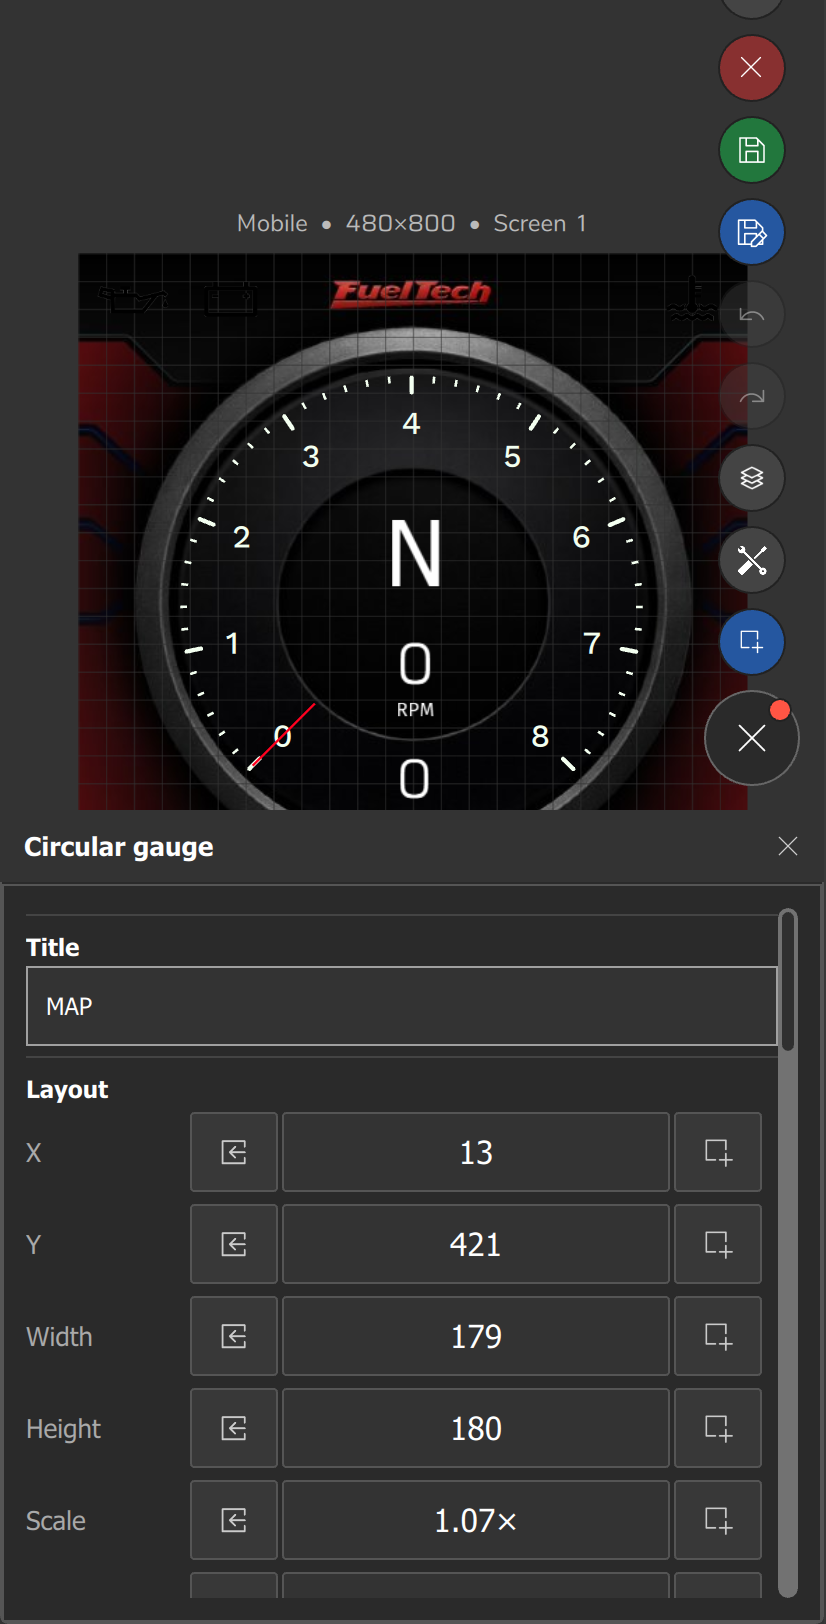
#Tablet and phone
- The tablet opens on the Tablet target and the phone on the Mobile target, but both edit the other targets in the list (the Video Overlay only exists on the PC): tap Select target, choose the name and confirm with OK.
- The phone uses sheets anchored to the bottom of the screen (full width, half the height, not draggable), with the texts of the FT700 and the FT700 Plus; the tablet uses floating panels.
- The tablet properties panel does not have Conditional visibility: a dashboard made on the PC with this rule keeps working, but the tablet does not edit it.
#4.4 Layers
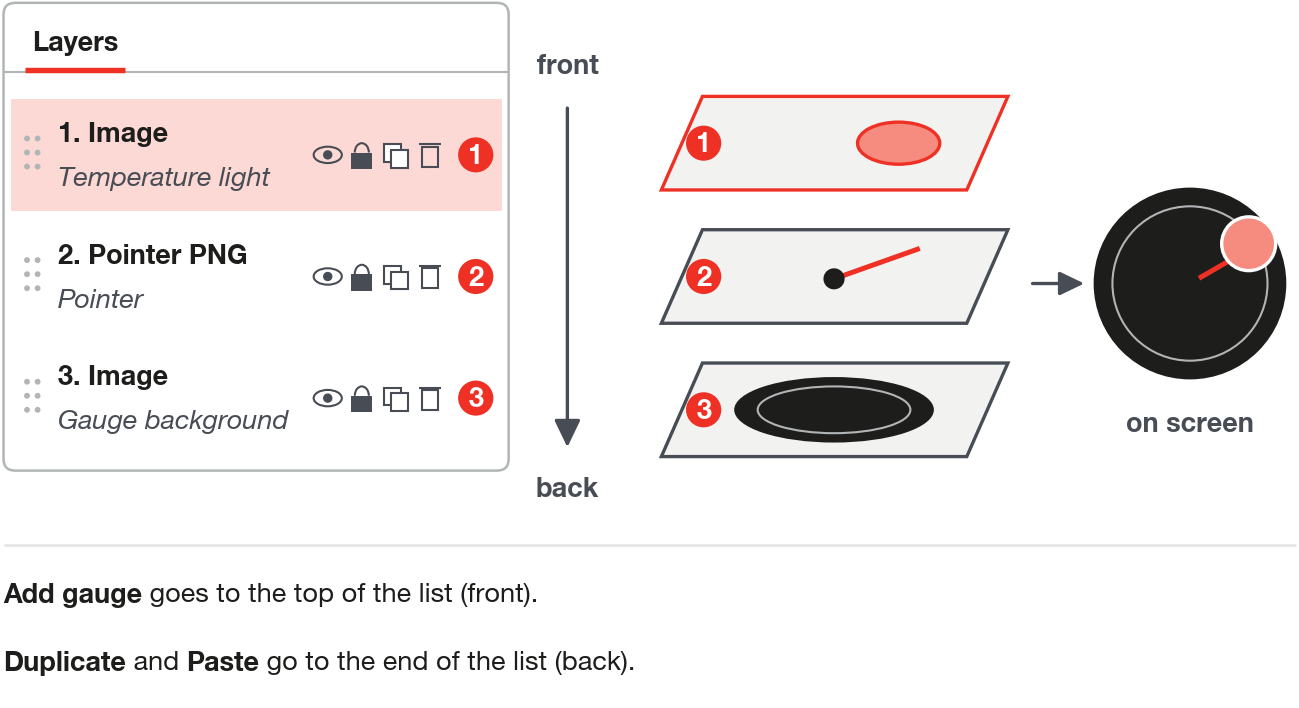
A layer is the position of a gauge in the stack. What is at the top of the Layers list appears in front of the others.
#The list
On the PC, the list is in the Layers tab; on touch, it opens with the Layers button. Each row shows "n. type name" (1 is the front layer), a handle to drag and four icon buttons: eye (hide or show), padlock (lock or unlock), copy (Duplicate) and trash can (Delete; red x on the tablet and the phone).
On the FT700 and the FT700 Plus, the four turn into a three-dot button with a menu. Its Delete asks Delete layer? and says the action cannot be undone, but Undo brings the gauge back, in the layer position it was in (section 4.6). On the PC, the tablet and the phone, the trash can deletes without asking.
On the PC, with several selected, the buttons of a selected row act on all of them; on touch, only on their own row. In the list, Ctrl + click toggles and Shift + click selects the range. There is no Select all: use Shift + click from the first to the last, or the rectangle over the entire canvas (it does not pick up locked or hidden gauges).
Drag the row by the handle to reorder. In the .ftds file, the order comes from the number at the end of each gauge's name: the lowest is in front, at the top of the list.
#Where each new gauge goes
Add gauge goes to the top of the list, in front of all. Duplicate (20 px to the right and 20 px below the original) and Paste go to the end of the list, behind all. All three start selected. Group puts the group in the position of the frontmost of the grouped ones.
The copy from Duplicate and what you paste can disappear behind another gauge: if you cannot find the copy, look at the end of the Layers list, select the row and drag it up.
#Hide and lock
- Hide hides the gauge in the editor and in the dashboard in use, without deleting it; Show brings it back. Hiding and locking are saved in the map.
- Lock prevents dragging the gauge and moving it with arrows and joystick. The Layout fields are disabled only on the FT700, the FT700 Plus and the phone; on the PC and the tablet they still change the locked gauge. On the PC, it does not respond to a click on the canvas (select it from the list); on touch, it selects, but does not drag.
#Group
Select two or more gauges and use Group (in the properties panel) or Ctrl + G. Only gauges that are not groups go in. The group is created in the box that wraps the gauges, with Scale 1.00. When the map is reopened or read by the unit, the front-to-back order inside the group can change: check the ones that overlap. Ungroup (panel button or Ctrl + U) puts the gauges back on the screen, selected, with position and Scale adjusted by that of the group.
Group turns off the entrance Animation of each grouped gauge, and Ungroup does not restore it (only Undo does): adjust the animation after grouping or ungrouping.
Inside a group, pointers (SVG Pointer and Pointer PNG) do not rotate by value and do not use the pivot: keep them outside groups (section 7.1). To take a whole dashboard from one target to another, see section 11.5.
#4.5 Add a gauge
On the PC, the Add gauge window opens from the green button in the top bar, from the button at the bottom of the Layers tab or from Add the first gauge (empty screen, Empty dashboard). When you choose a type, it shows its styles (up to four: Modern, Classic, Neon and Cyberpunk): choose the style before adding.
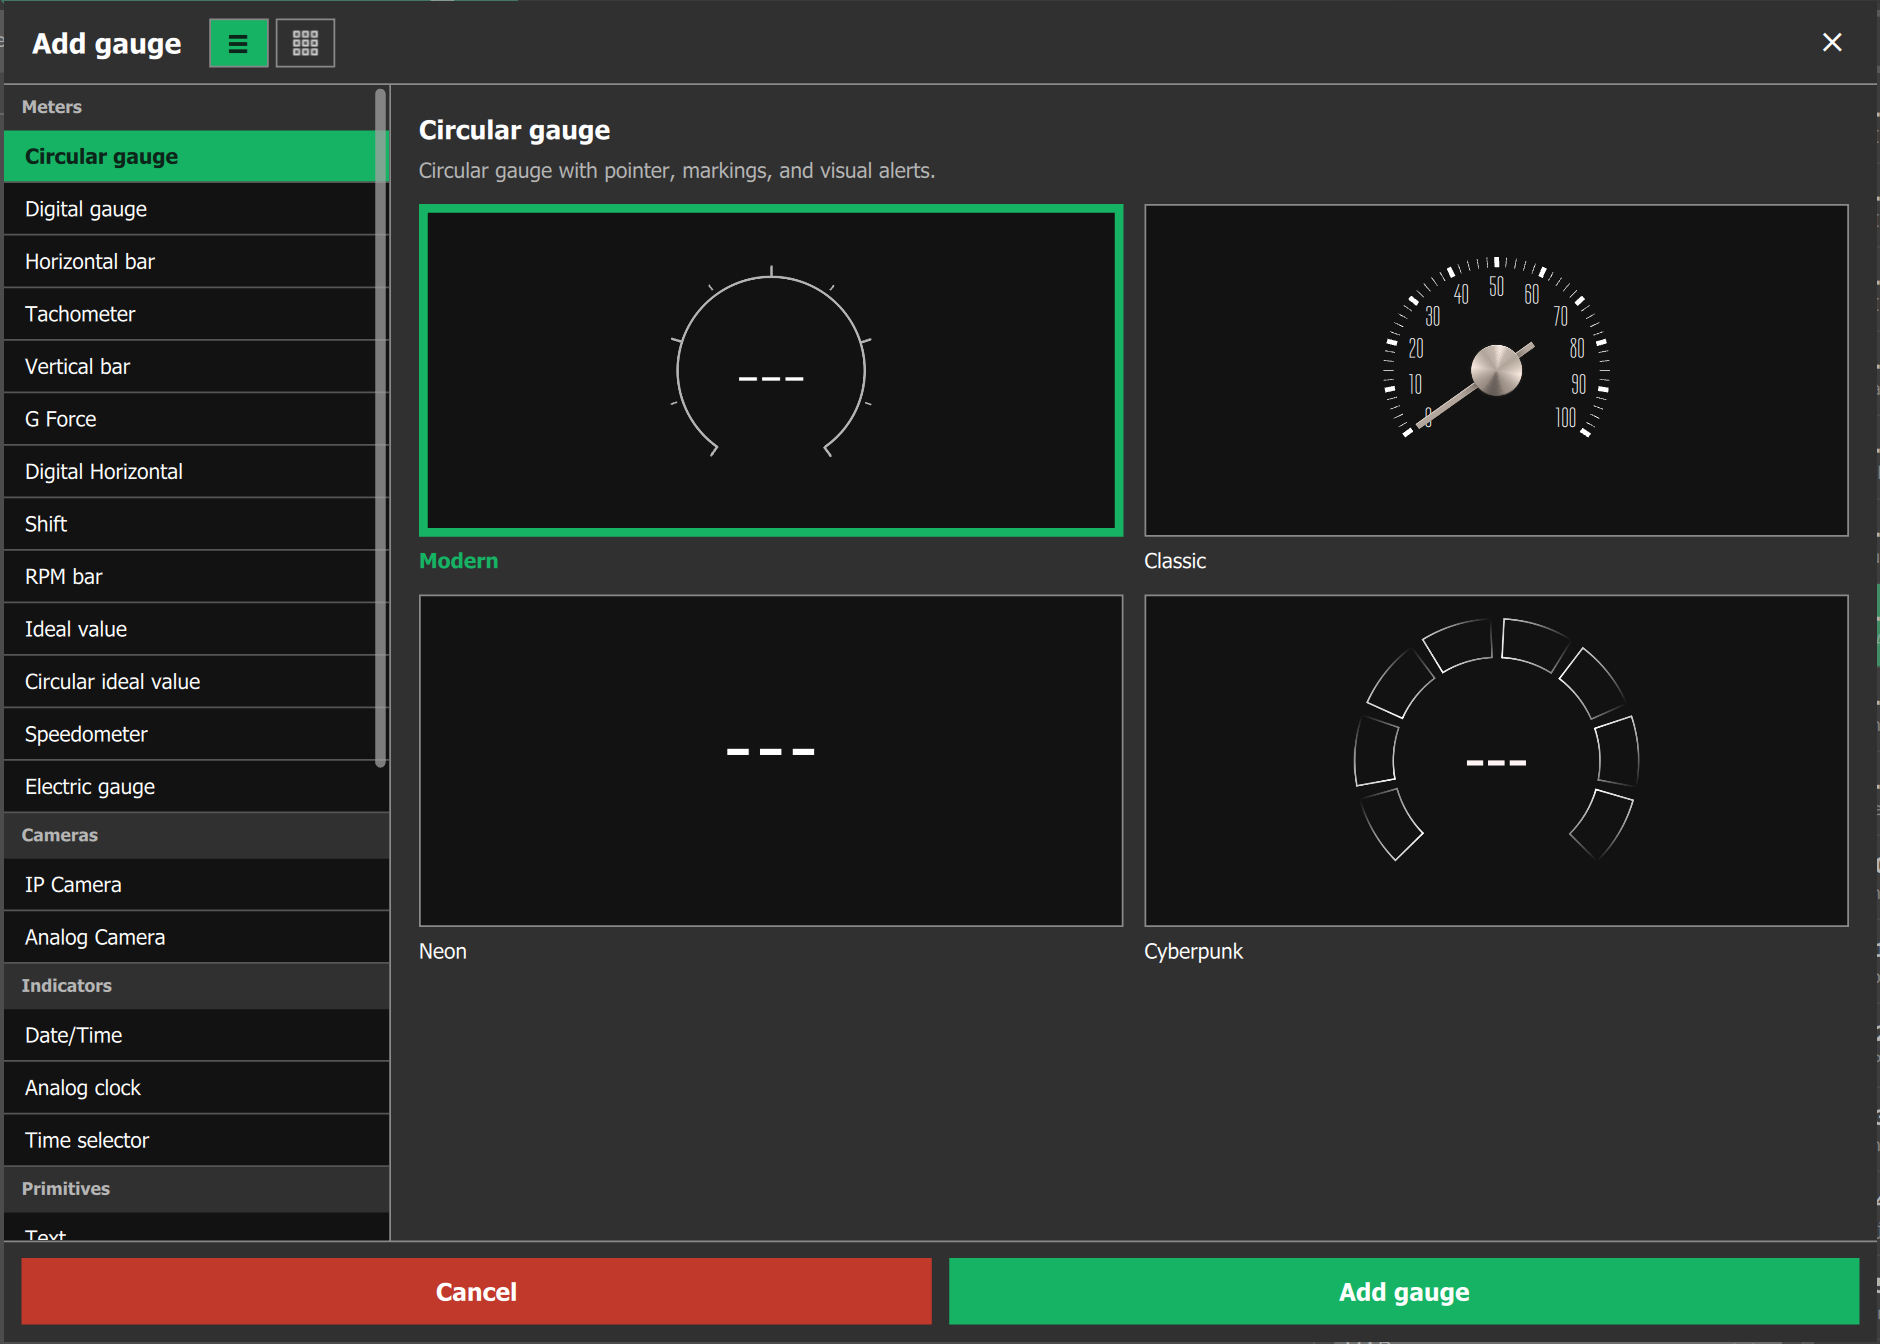
The window has 32 types in six categories: Meters (13), Cameras (2), Indicators (3), Primitives (9), Pointers (2) and Buttons (3), described in chapters 6 to 8. The Group, the 33rd type, is not in it: it is created by Group.
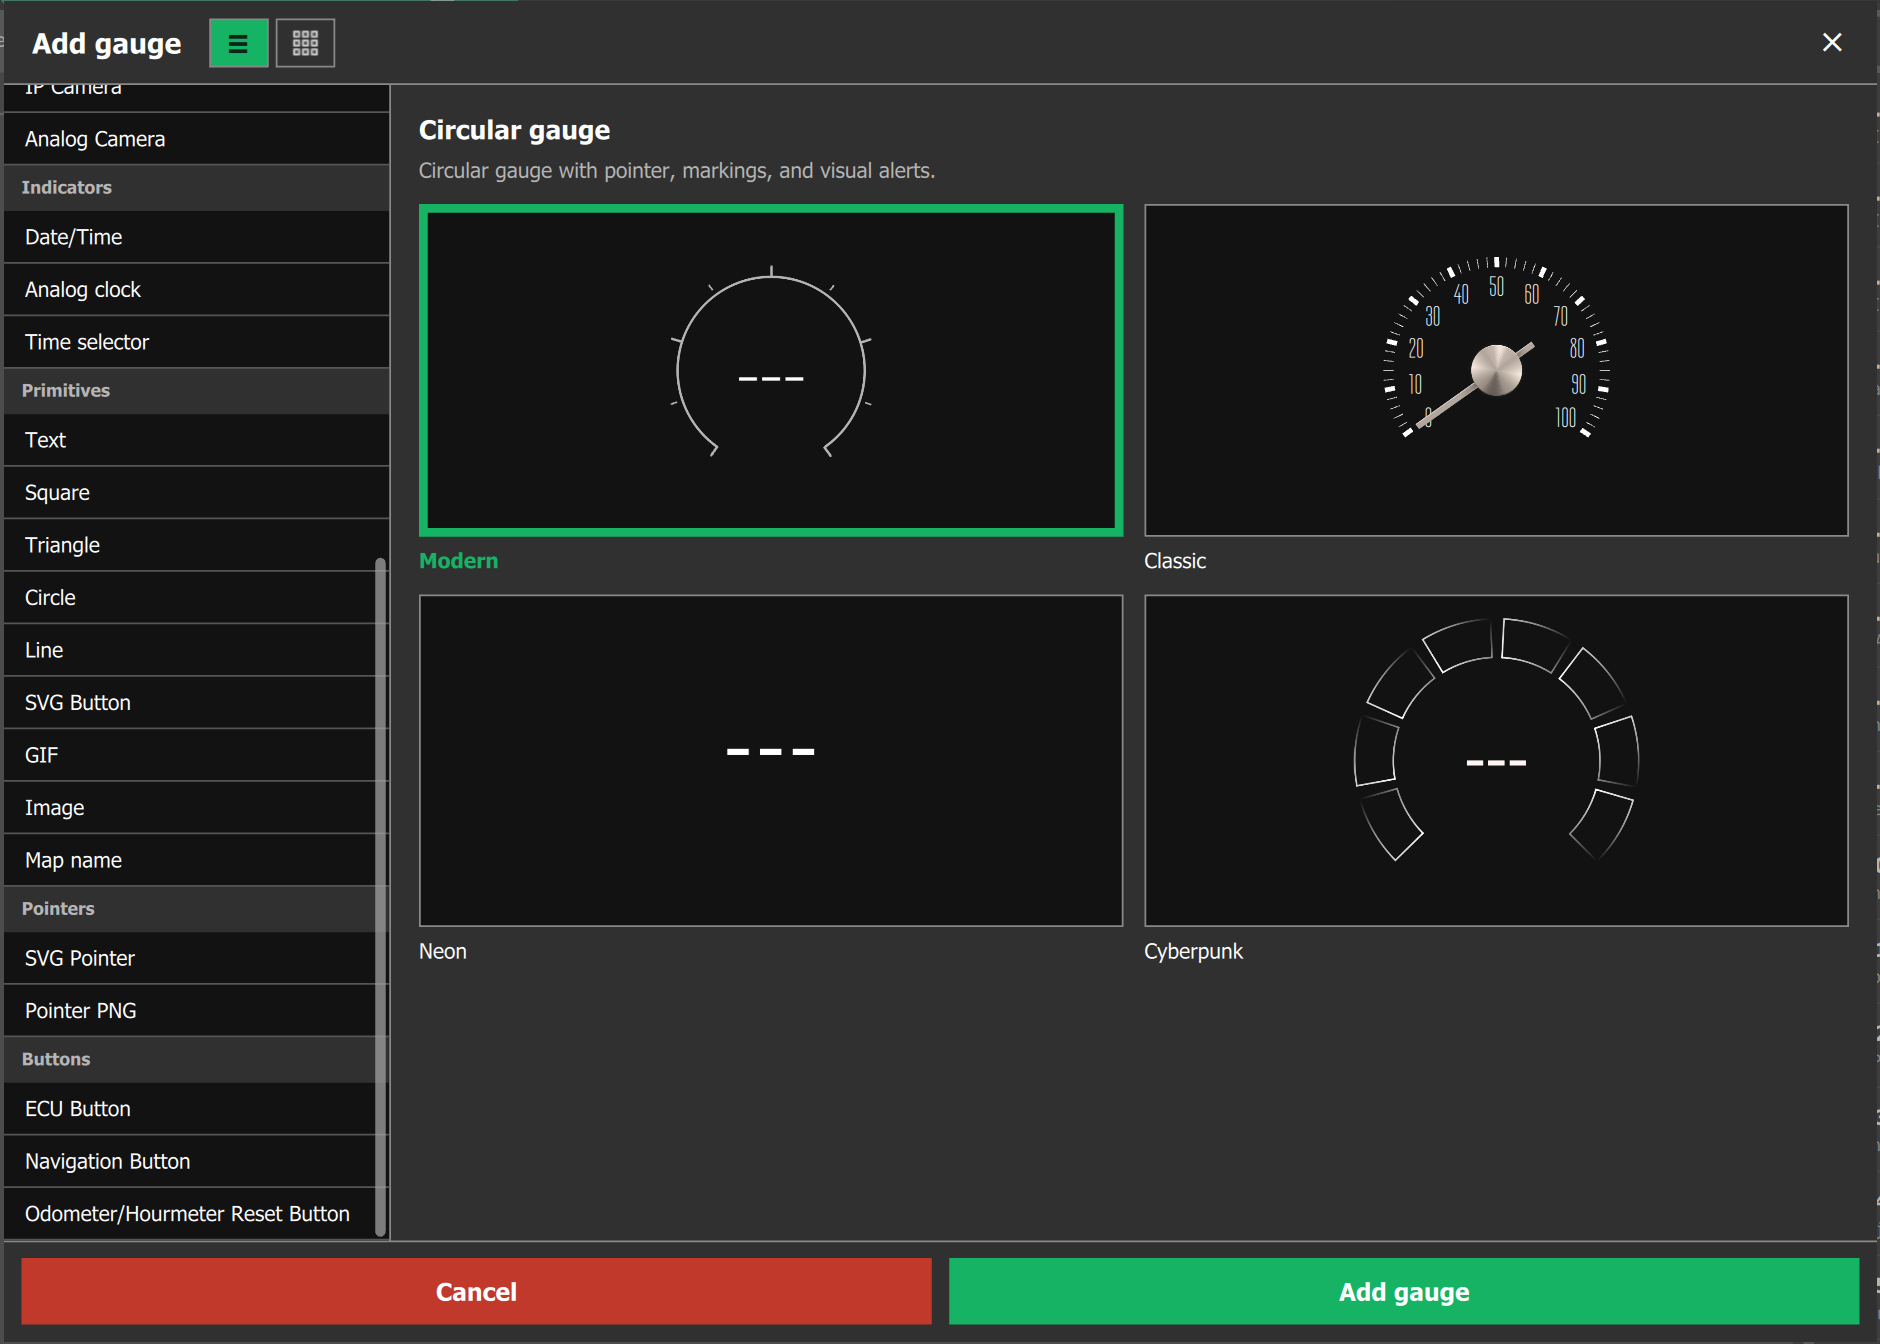
On touch, the Add button opens the Add component list, with no style choice (the default style is used; change it later in the Style field); the pointers are in Primitives.
The new gauge starts at half the default width and height of the type, at the front of the stack and selected: on the PC, with the upper left corner at X 100, Y 100; on touch, near the center. The file-based ones (SVG Pointer, Pointer PNG, SVG Button, GIF and Image) open the file picker when added, on the PC, and save the file inside the map (chapter 7).
#4.6 Undo and redo, copy and paste, duplicate, delete
#Undo and redo
- The history is shared by all targets and screens, with 50 steps (the 51st discards the oldest). Undo and Redo go to the target and screen of the action.
- What goes into the history: add, delete, duplicate, paste, group, ungroup, reorder layers and change the Type. Each drag, resize, align or move gesture is one step; editing a field is a single step.
#Copy, duplicate and delete
- On the PC, copy and paste with Ctrl + C, Ctrl + X and Ctrl + V (on the FT700 Plus, with a keyboard connected). On the FT700, the tablet and the phone, use Duplicate (the row's copy button in Layers or an item of the row's menu).
- Only the selected gauges are copied: the screen header (title, backgrounds and night mode) does not go. The clipboard works between screens and between targets. Paste does not rescale: a set from VCU (FT700) pasted into VCU (FT700 Plus) keeps its size in pixels (section 11.5).
- To delete, use Delete, the trash can or the row's Delete, or Delete selected n. Undo brings the gauge back.
#4.7 Screens
Each target has from 1 to 4 screens (the Video Overlay has 1). The Initial screen is the one the dashboard opens when it loads.
#Where to configure
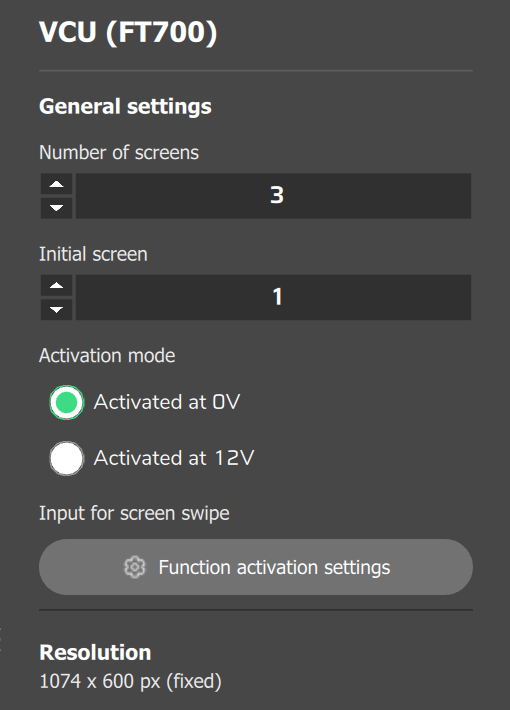
The target settings are in the Device tab (PC) or in the General tab of the Dashboard Settings window (touch); those of each screen, in the Screen tab (PC) or in the Screen 1 to Screen N tabs (touch).
| Field | On which targets | What it does |
|---|---|---|
| Number of screens and Initial screen | All, except Video Overlay | From 1 to 4 screens. Decreasing removes the screens at the end of the list (see below). The initial screen goes from 1 up to the number of screens. |
| Activation mode | VCU (FT700) and VCU (FT700 Plus) | Activated at 0V or Activated at 12V. Does not change the polarity: that of the Input sensor applies (section 8.5), where Activated at 0V or Activated at 12V is set, with or without Pullup. |
| Input for screen swipe | Both VCUs | Opens the setup of the physical input that switches screens (section 8.5). |
| Resolution | Targets with adjustable resolution | Width from 320 to 7680 and Height from 240 to 4320. Reverse screen orientation (Reverse orientation, on touch) swaps width and height without moving the gauges. |
The Screen title appears in the Export Dashboard and Import Dashboard lists, but not in the dashboard in use. To switch screens in the editor, use the arrows and the Screen N list (PC) or the screen navigator, the strip at the top with Screen 2/4 and arrows (touch, only with more than one screen). Switching screens or targets asks nothing: the edits stay in the editor's memory and only go to the map with Save (section 4.8).
#Reducing the number of screens
If the Initial screen goes past the new number, it becomes the last one. The removed screens come back, the most recent first, if you raise the number again in the same editing session; after Save, treat them as lost: export first the ones you want to keep (section 13.2). There is no copying, duplicating, moving or reordering of screens: to take a screen somewhere else, use Export and Import (chapter 13).
#Switching screens in use
On the FT700 and the FT700 Plus, the dashboard changes screens by swiping, by a physical button (the input of Input for screen swipe) or by the Navigation Button gauge (chapter 8). On the other devices, you also swipe, and the physical button does not act. Do not confuse Initial screen with Startup screen selection, from the Interface menu (section 3.2).
#4.8 Save, Cancel and Exit
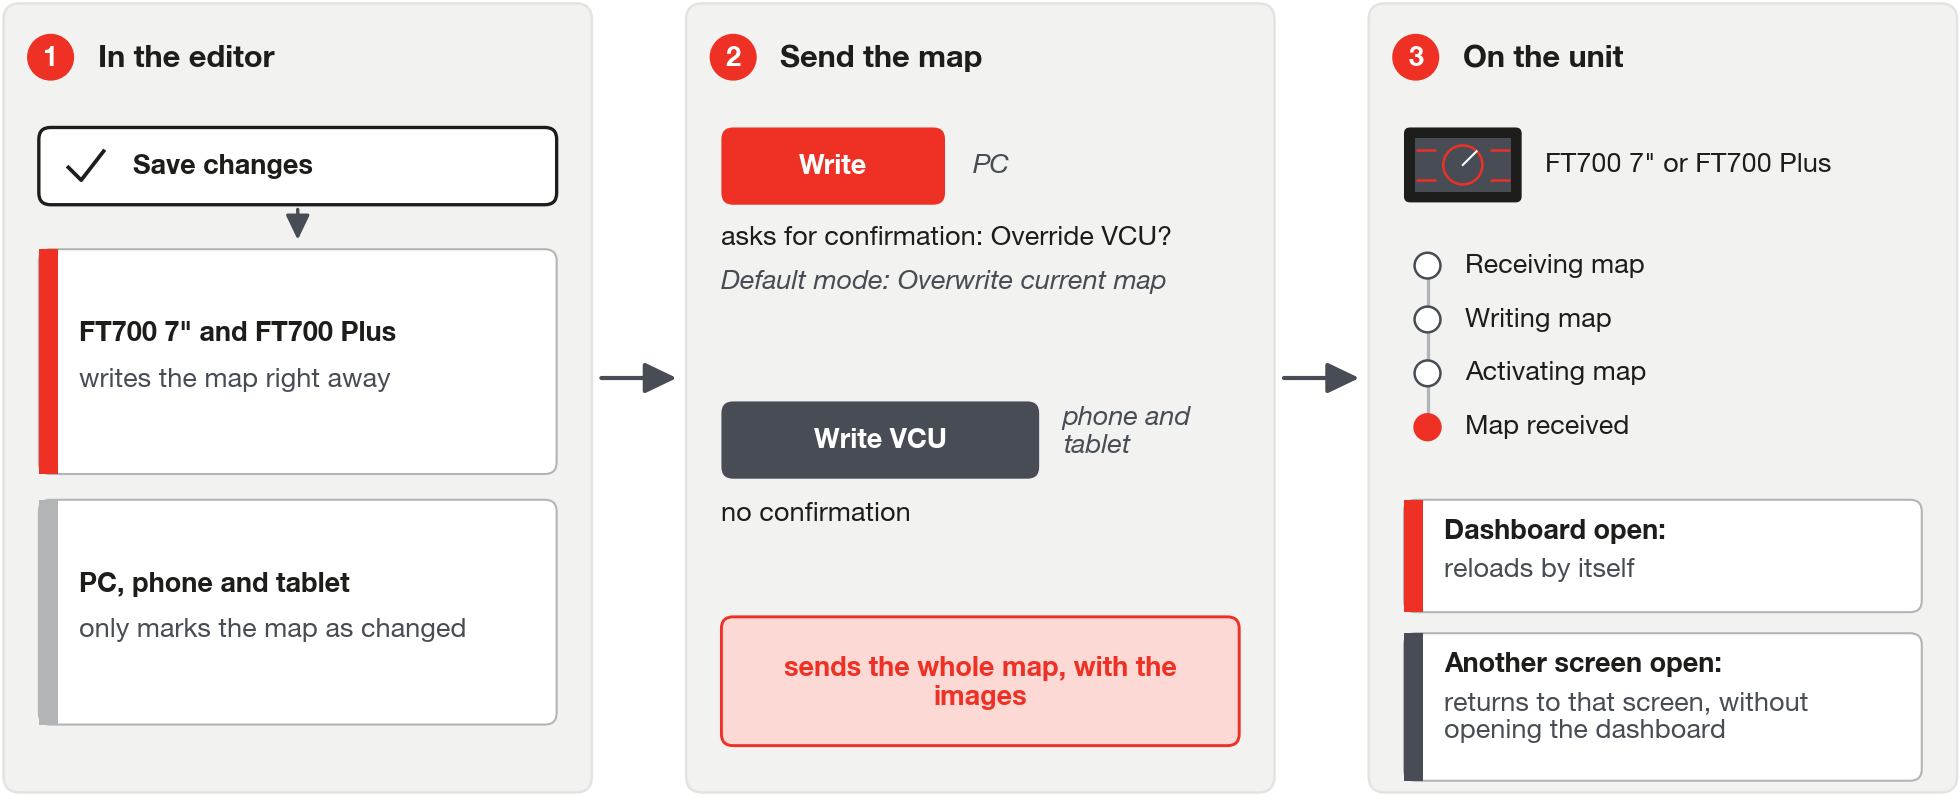
Save and Cancel apply to all targets at once. The dashboard lives inside the map: Save updates the map in memory, and sending the map to the VCU is another step.
#What Save does on each device
| Device | What Save does | How to send the dashboard to the VCU |
|---|---|---|
| PC | Marks the map as changed. | Write button, with confirmation (Override VCU?). |
| FT700 and FT700 Plus | Writes immediately, to the unit's storage. | It is already on the unit. |
| Phone and tablet, with a map | Marks the map as changed. | Write VCU button, without confirmation, always overwriting. |
| Phone and tablet, without a map | Opens Save as local dashboard: you type the name and the app writes a .ftds file (over it, if it already exists). | It does not go through the VCU (section 13.6). |
On the PC, Write also overwrites the .ftmap file when the map was opened from a file; a map with locked protected functions asks for the password and does not save. There is no sending of the dashboard alone: Write takes the entire map (chapter 13).
#Cancel and exit
Cancel changes reloads all targets from the map and resets the history, discarding the editing of all targets, not only that of the target on screen. On the PC, the icon only turns on with changes and asks Cancel changes? (No and Yes); on touch, the button discards immediately, without confirmation.
| Where | What happens when you exit |
|---|---|
| FT700 and FT700 Plus, Exit | With a change, asks There are unsaved changes! and Do you want to save changes before closing?: Cancel (stays), No (discards and exits) or Yes (saves and exits). |
| Phone and tablet, Exit or system back | Same question, only with No and Yes. |
| PC, closing the editor tab | There is no warning: before closing, click Save changes or Cancel changes. |
After Write, the unit only reloads the dashboard by itself if it is open; if it was on another screen, open the dashboard from the menu (section 13.1).